InfoTrack users can order process serves in all 50 U.S. states, with or without a related court filing. Orders placed online in InfoTrack are fulfilled locally by experienced, vetted process servers who are versed in applicable statutes.
Starting your order
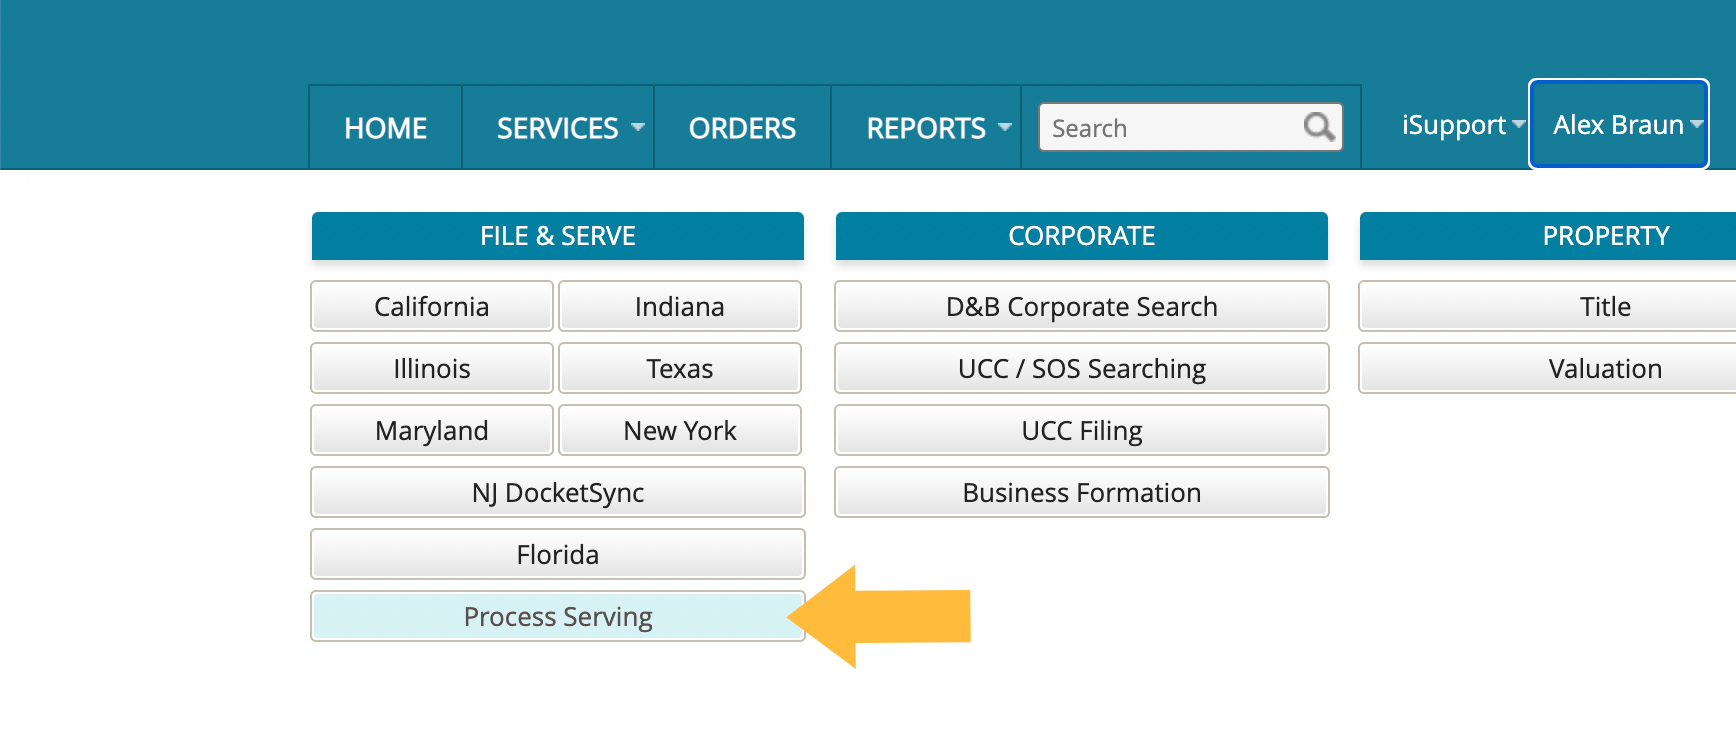
To start a stand-alone process serve order from the InfoTrack dashboard, click the Process Serving button at the bottom of the File & Serve column on the left.
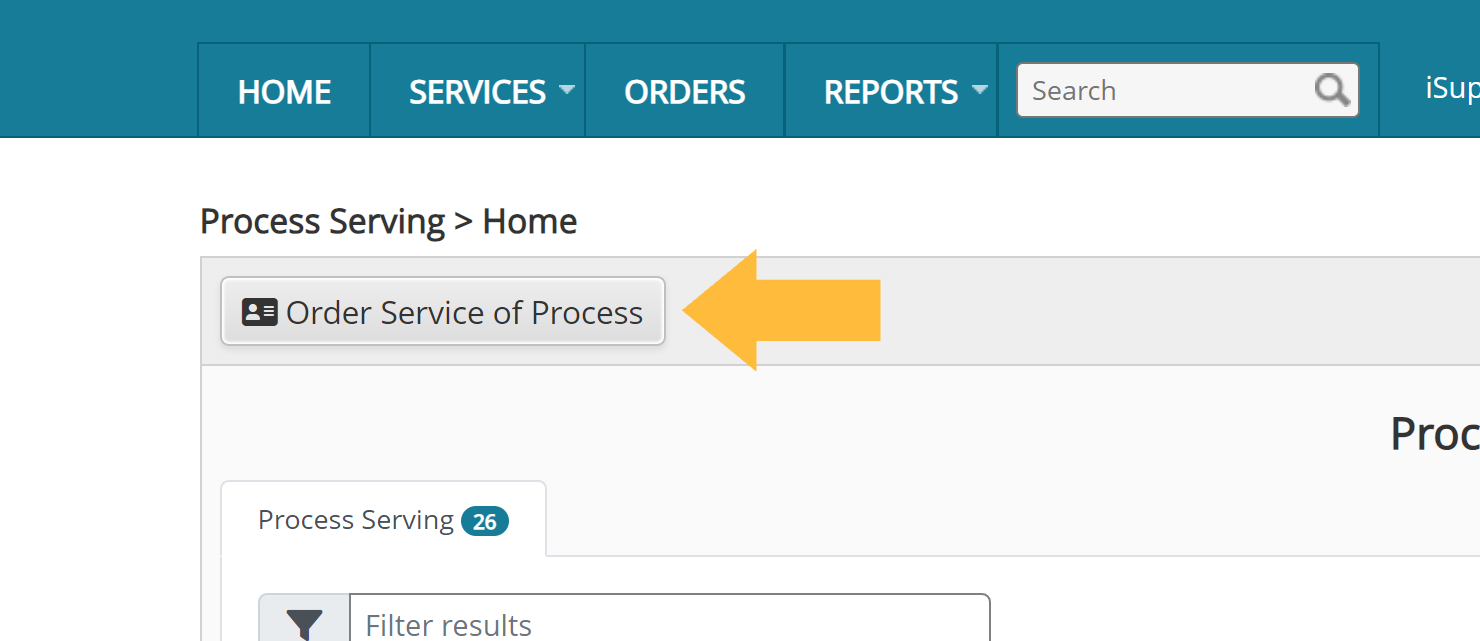
On the next screen, click the Order Process Serving button on the top left.
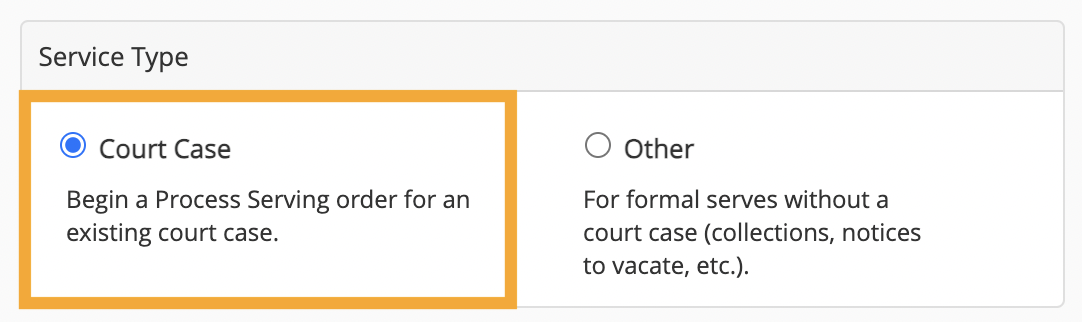
Before you start your order, select whether it is related to a court case or something else. This will affect the information you'll need to provide.
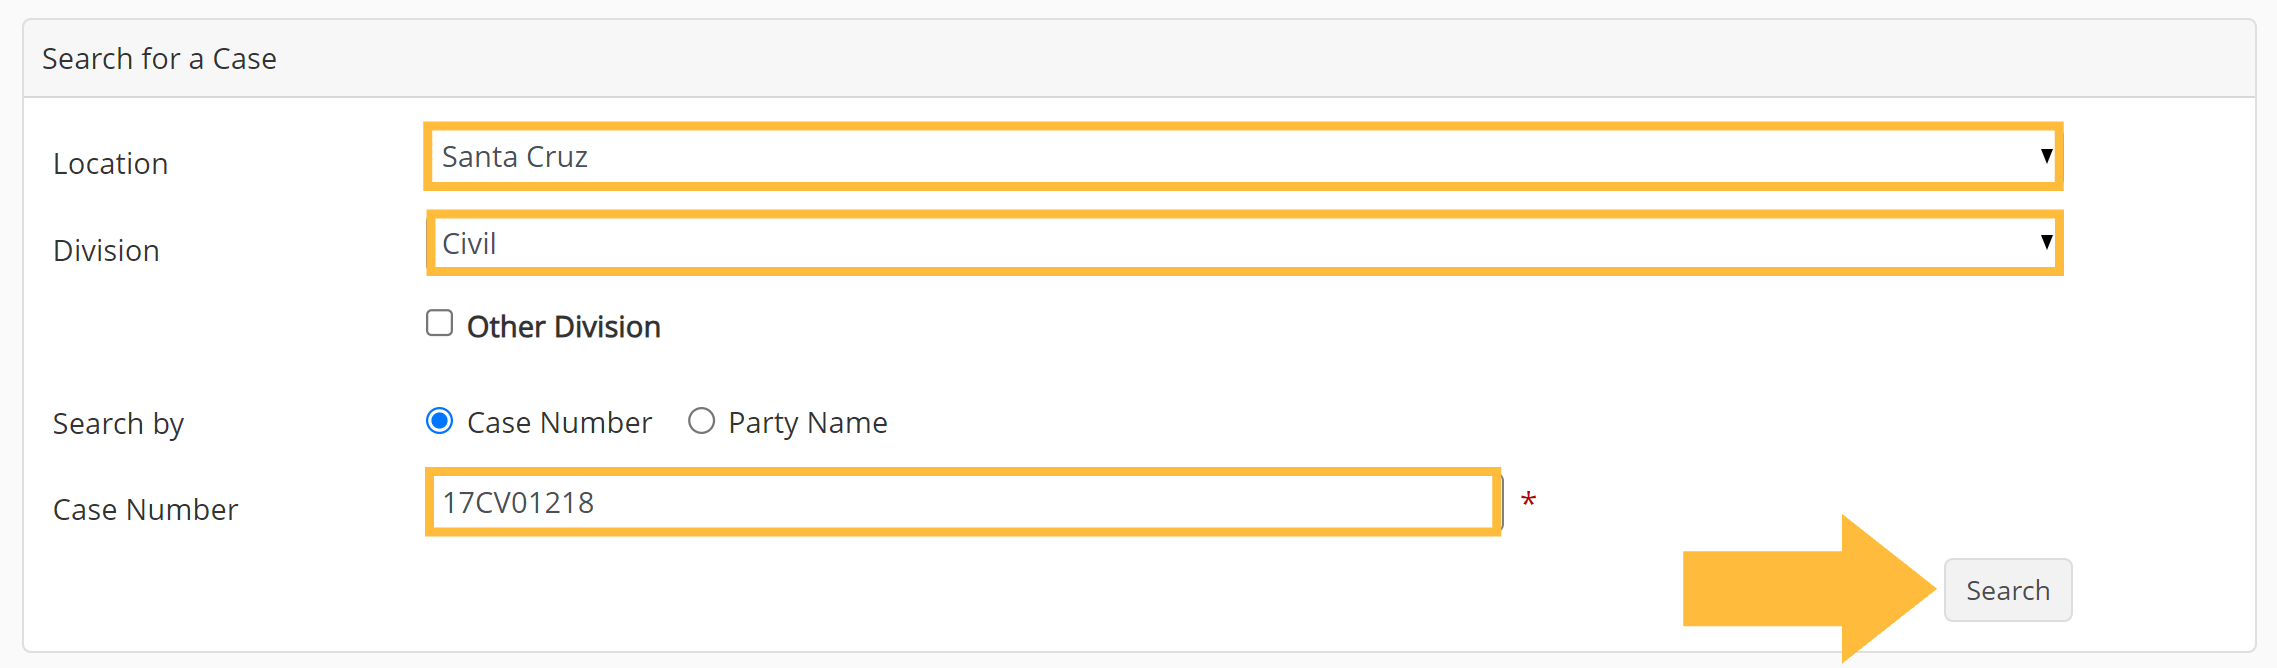
If your order is connected to a court case, you'll first be prompted to search for the case to link its details to your order. Enter the relevant information and click Search.
If you see the relevant case in a search result, click the action menu on the right to order your process serve.
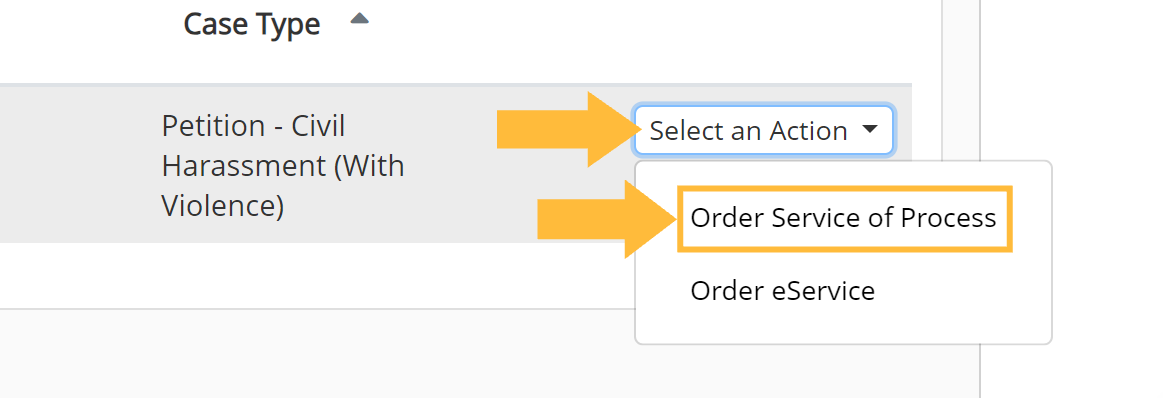
Note
If you can't find your case, you can still click this link to continue with your order. However, without a linked case record, you will not be able to use certain case automation features like automatic proof-of-service filing.
Adding case information
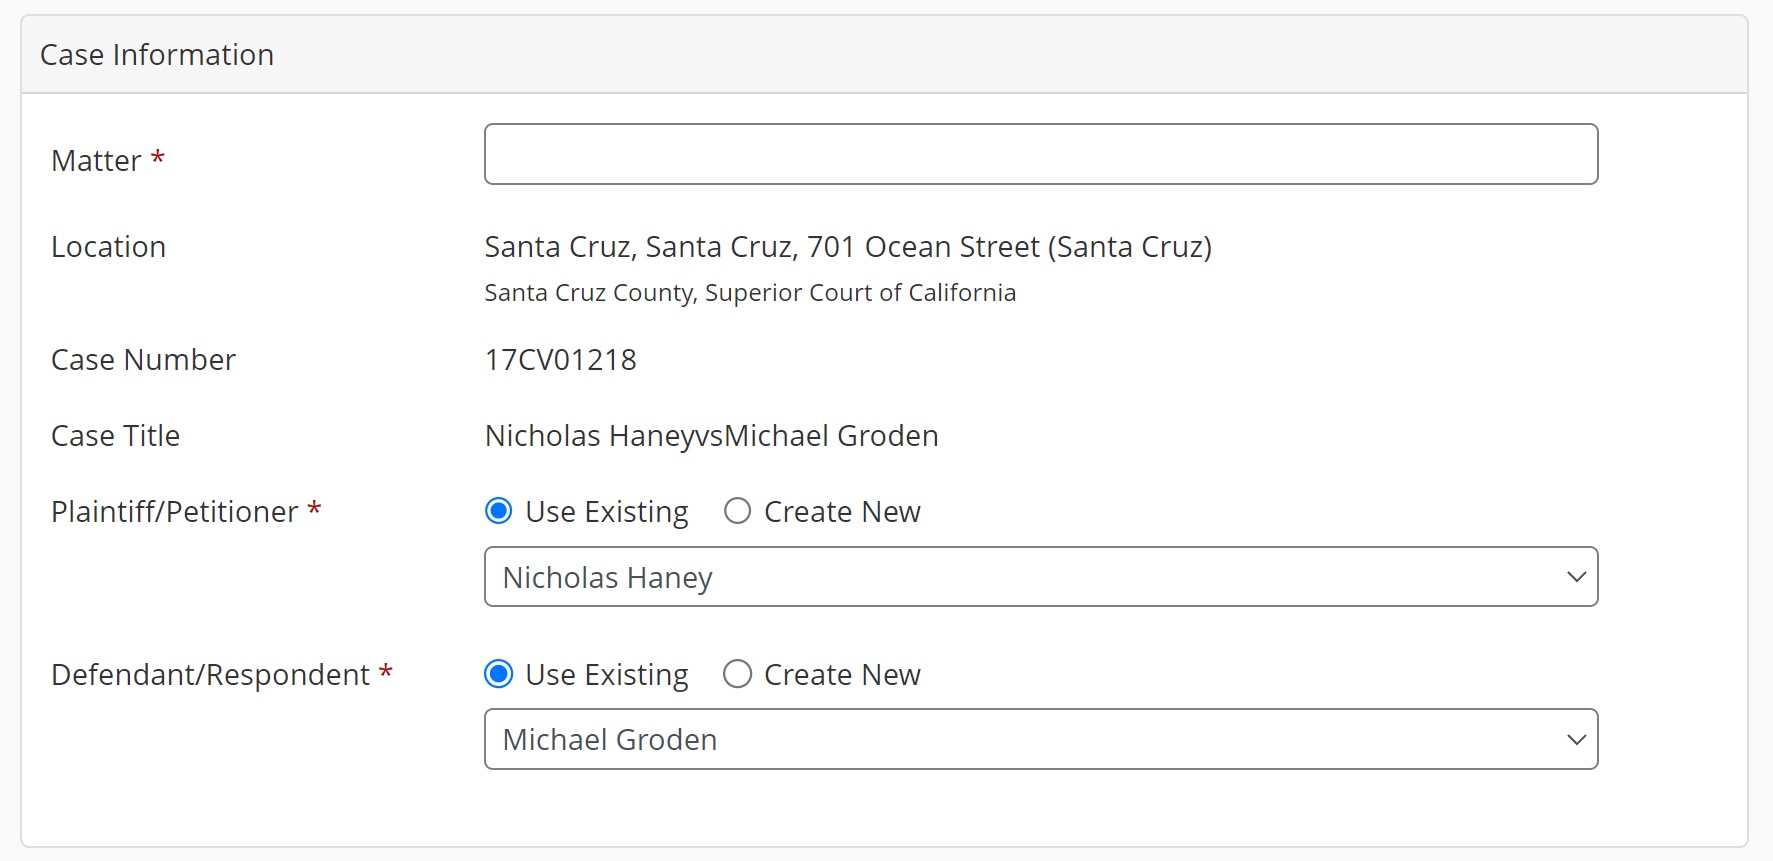
If you just linked your case record or are integrated with a case or document management software, some case information will already be filled in at the top of your order.
If not, fill in the matter name and the rest of your case information to start the process serving workflow.
Choosing your service level
Next, choose how quickly you need the document(s) to be served.
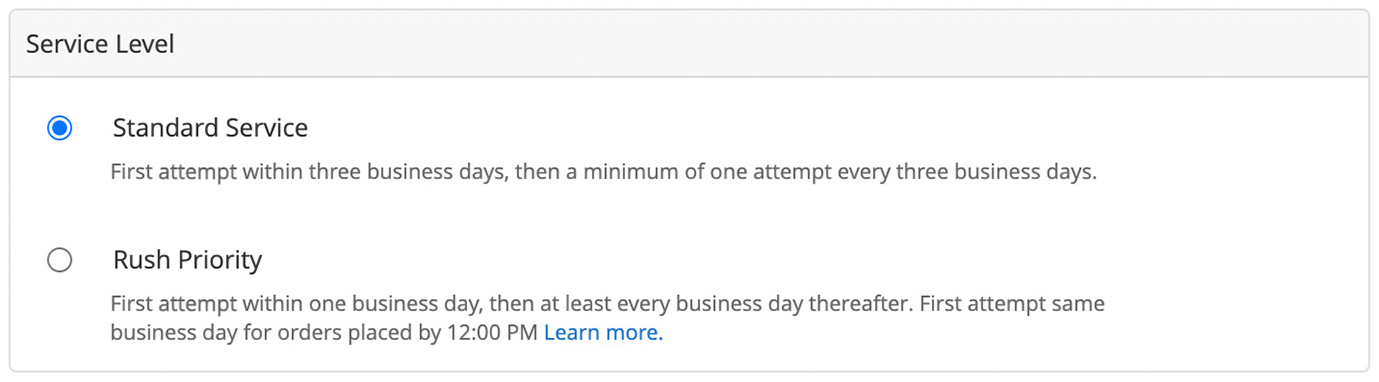
The default option, Standard Service, will commence service attempts within three business days. If you need service to begin sooner, Rush Priority can effect same-day service if your order is placed by noon.
Adding documents to be served
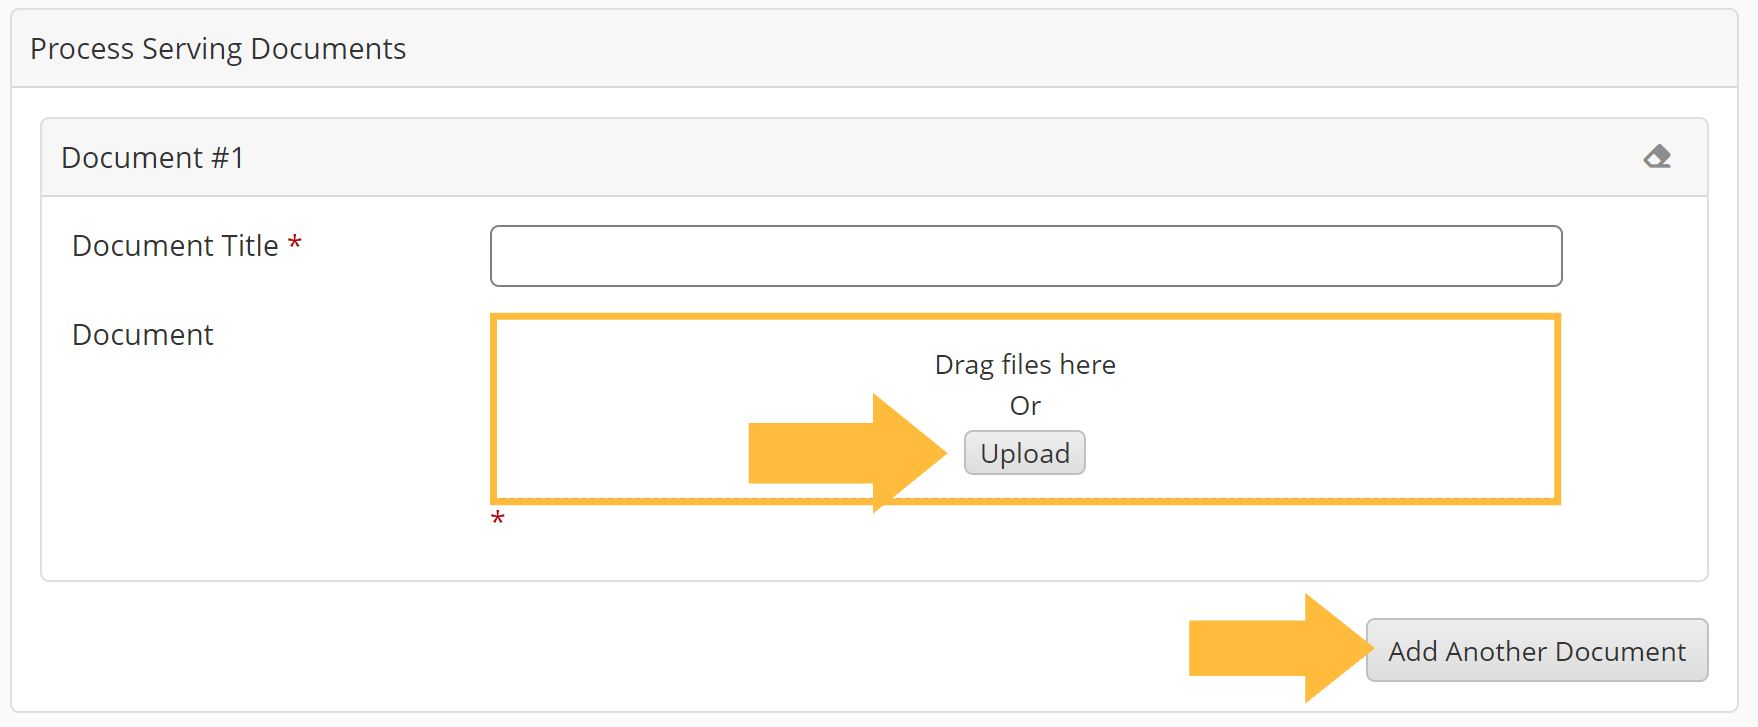
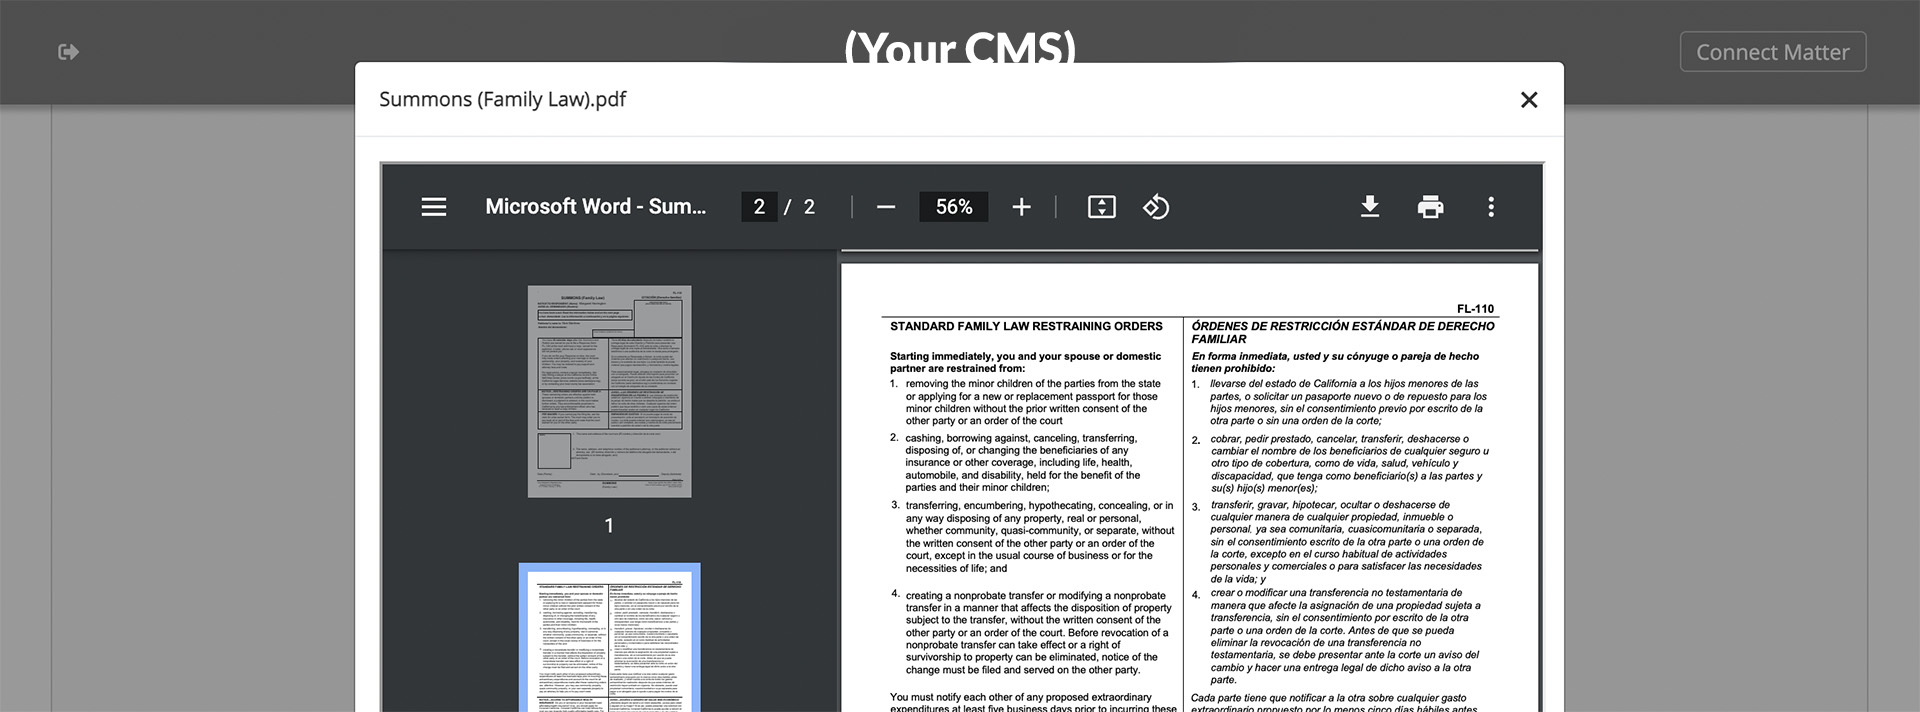
Drag the documents you wish to serve into the drop zone, or click “Upload” to select them from your computer. If you are integrated with a case or document management system, clicking Upload will launch a pop-up that also lets you select documents directly from your connected matter.
If you need to serve additional documents, click the Add Another Document button.
Once your document attaches, you can click the blue preview icon to verify that it's the right one.
Adding attorney information
Attorney entries that have previously been saved to your firm account will appear in the drop-down menu.
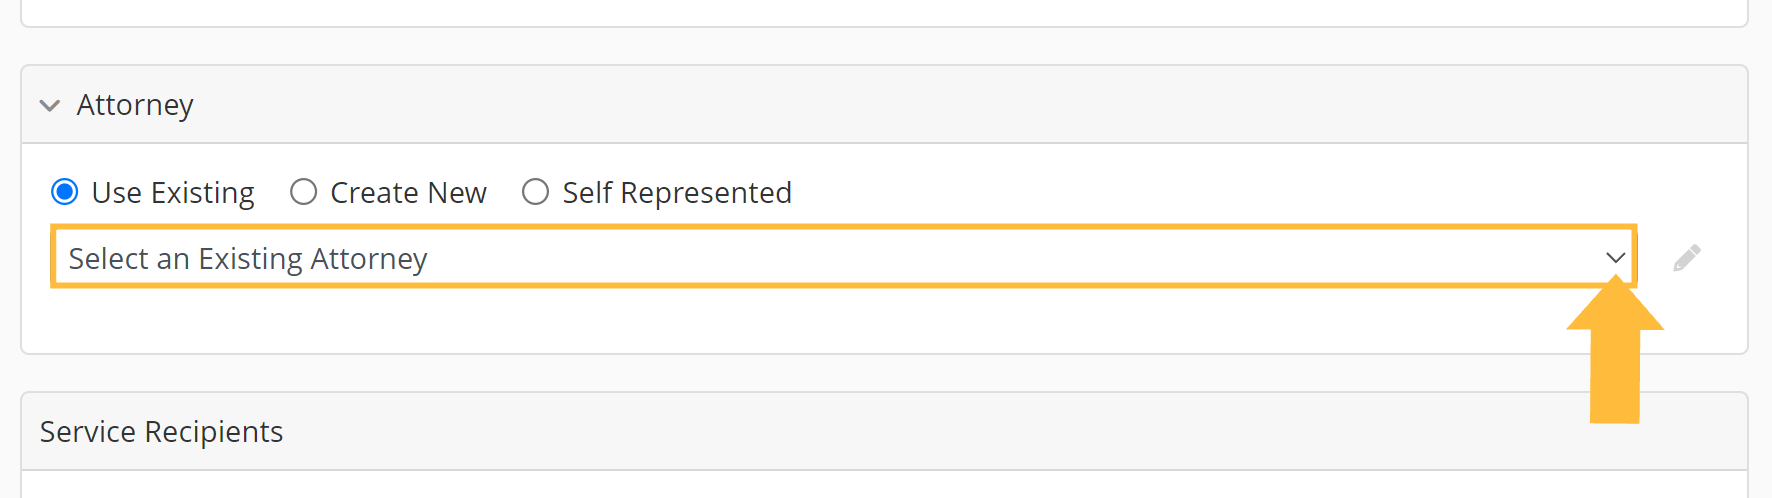
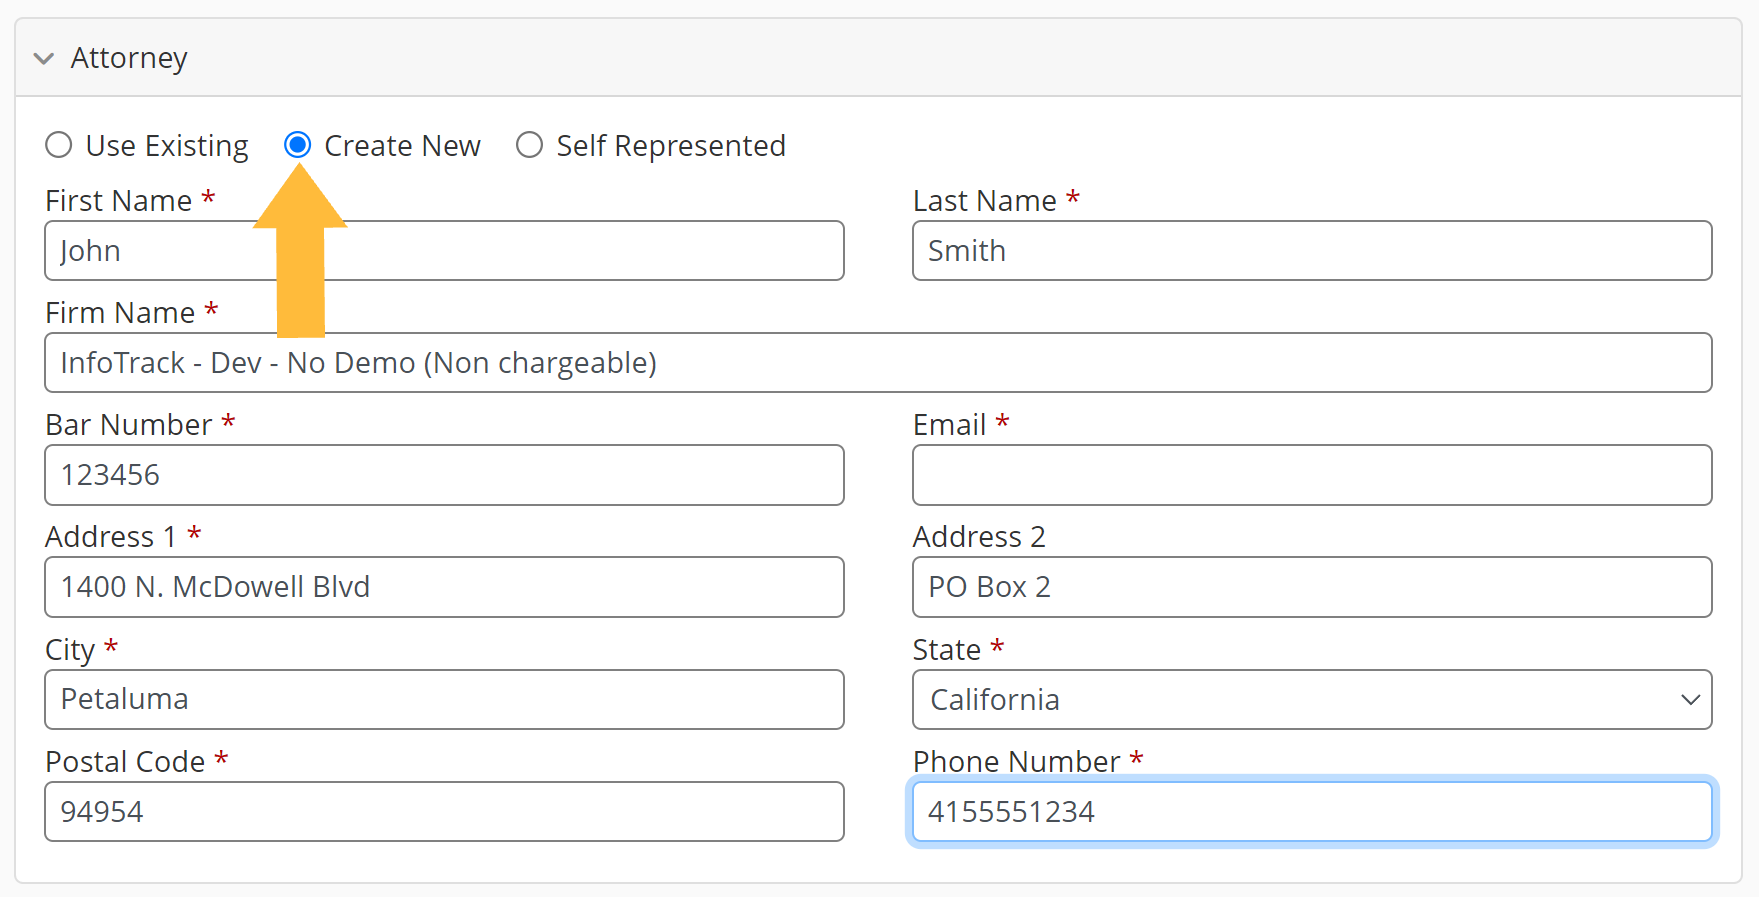
If the attorney you need is not in the drop-down menu, you can click the radio button to create a new one or choose to file as a self-represented litigant.
Enter your attorney details and continue to the next section.
Adding recipient information
Next, you'll need to add information about your recipient(s), including any details about the service location that might help the server complete the serve.
If this information is available from a linked case record or matter record, it will appear in the Use Existing drop-down under Recipient #1.
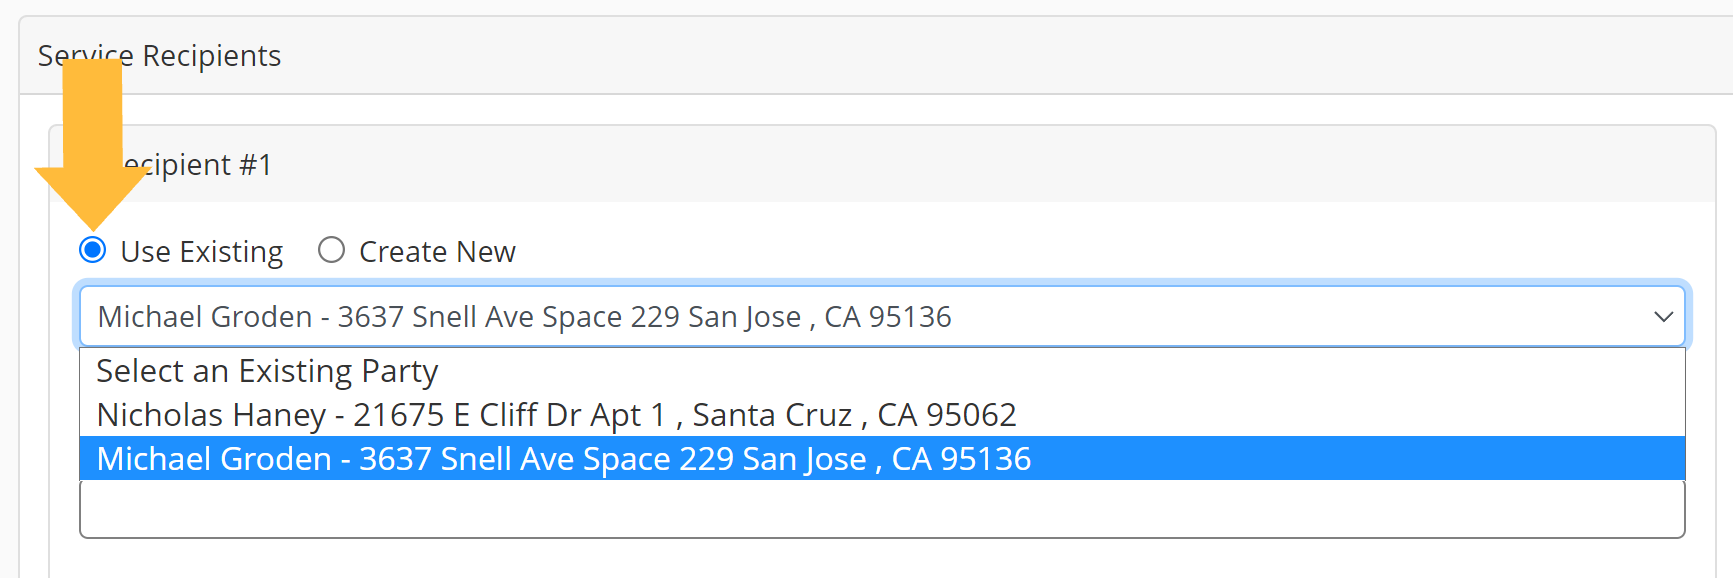
If the correct option is not available, toggle to Create New. A section of fields will launch allowing you to add any information necessary to effect the serve. InfoTrack even offers a skip trace option if you need the server to research the recipient's current address (additional fees apply).
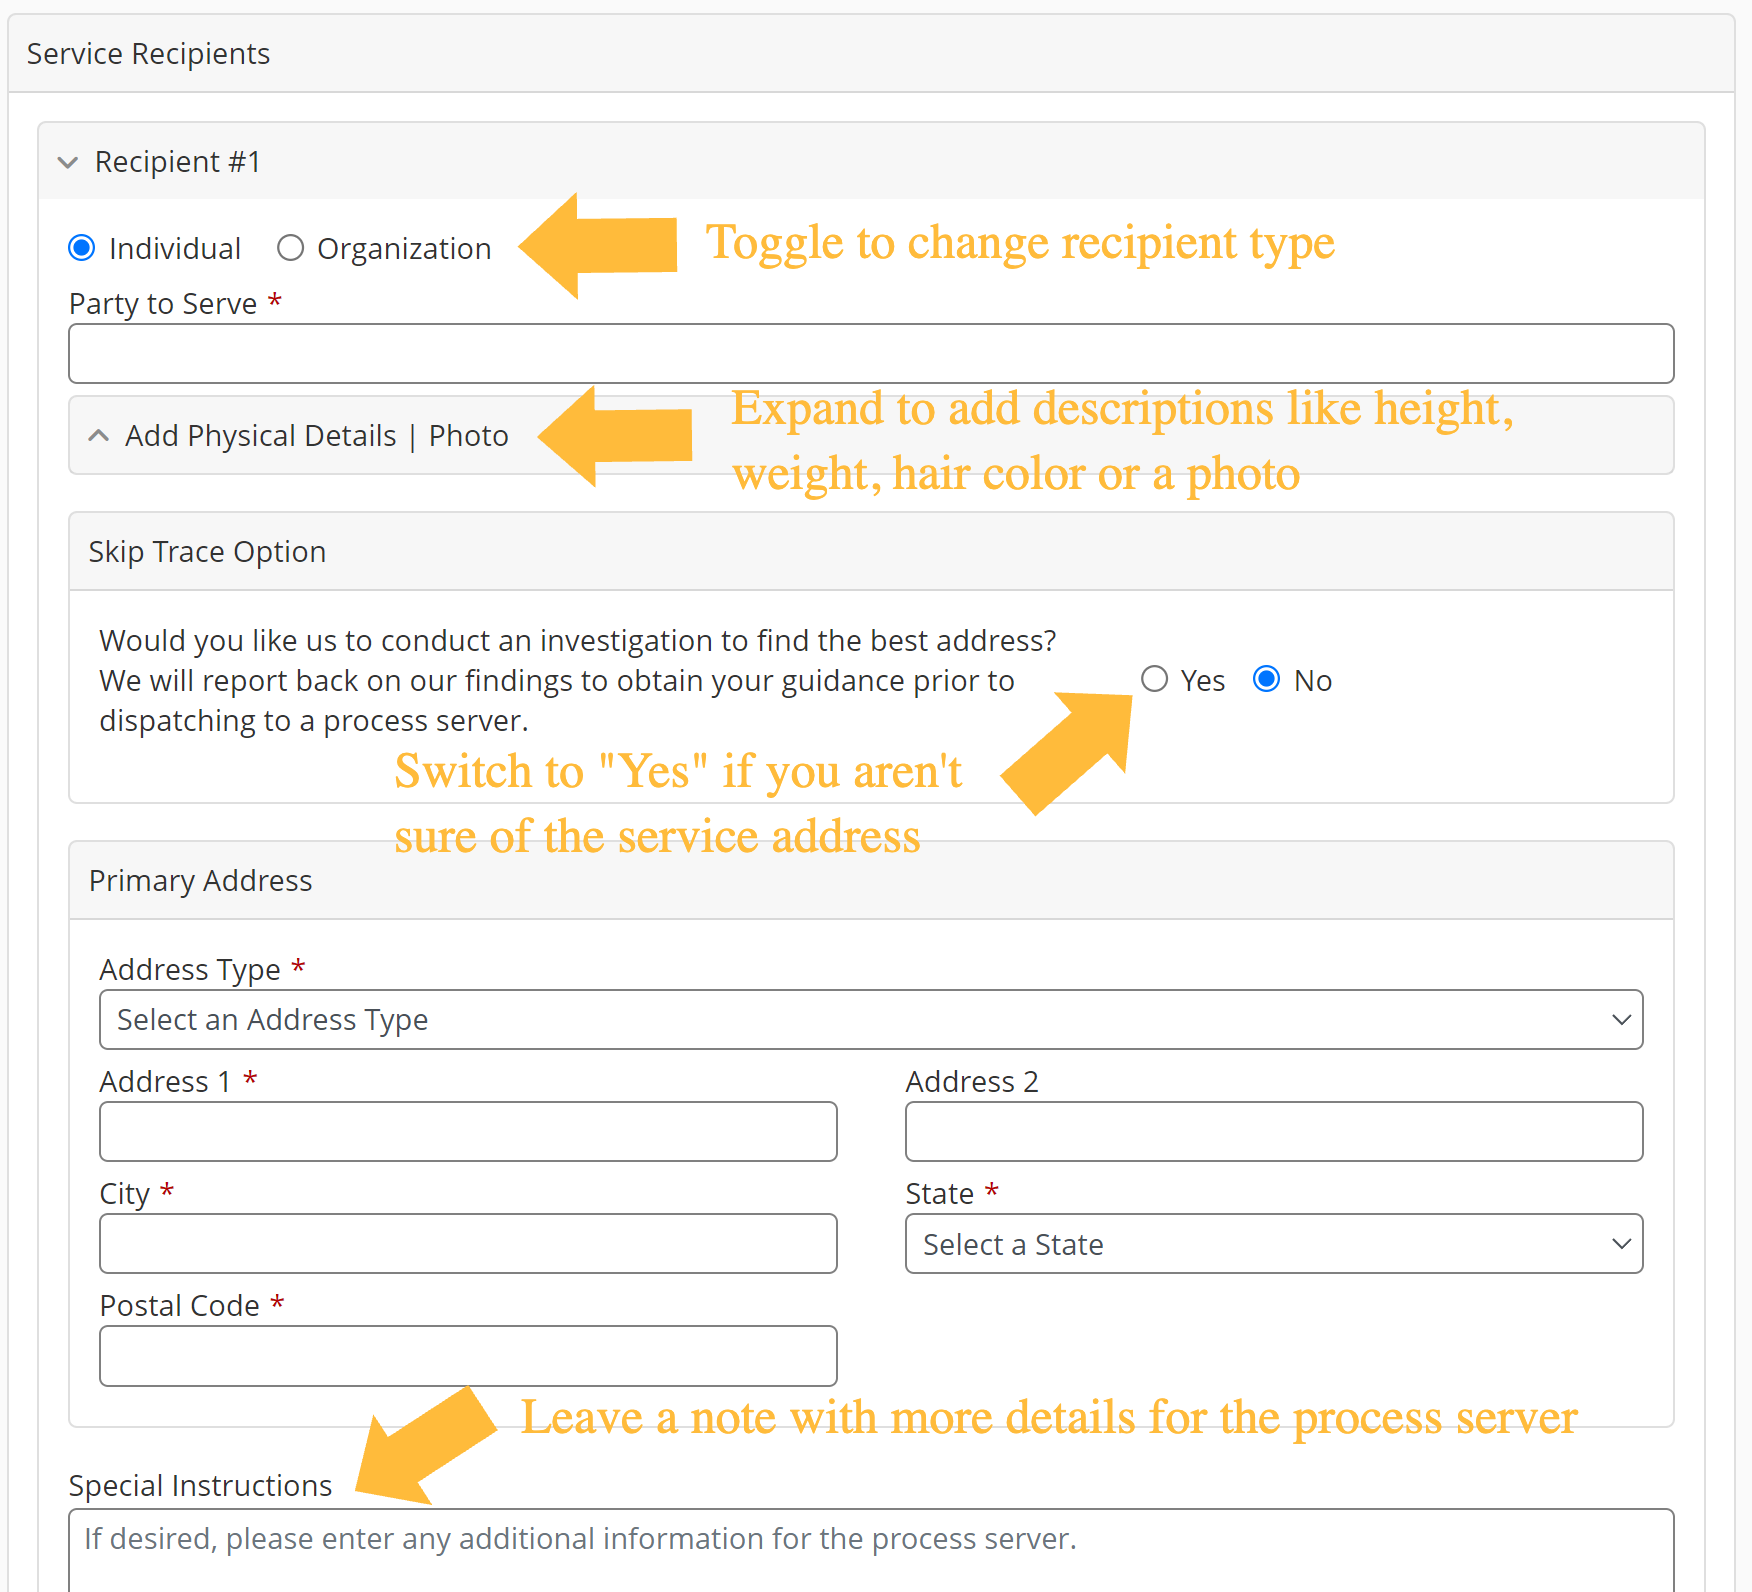
Fill out as many fields as necessary to effect the serve. Any required fields will be denoted with a red asterisk.
If the document you're serving is a subpoena, check that box under Additional Options and provide the information required to advance a witness fee.
If you'd like to include additional recipients in your order, click the Add Another Recipient link in the bottom right corner.

Filing the proof-of-service
In some courts, InfoTrack can automatically generate and file the proof of service document once the serve is completed, for the same price as a regular court filing. (This feature is only available when the serve order has been properly linked to a court case, as demonstrated near the top of this page.)
To enable this option, check the appropriate box.

Payment and submission
Review your entire order before submitting, including the estimated fees. Note that any fees for remote service zones or high page counts are pre-calculated in your estimated total.
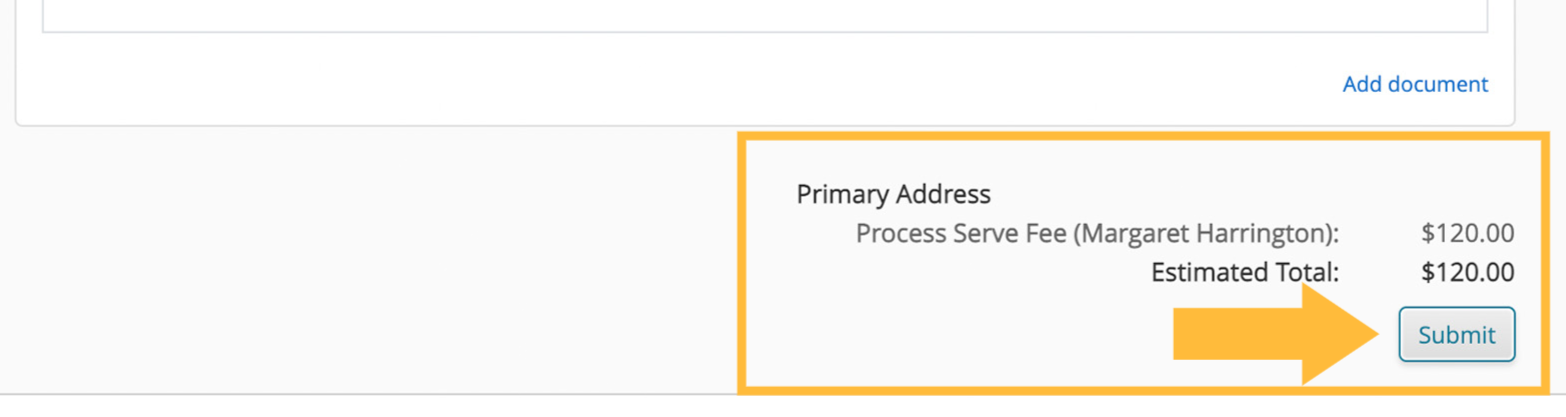
When you are satisfied, click Submit.
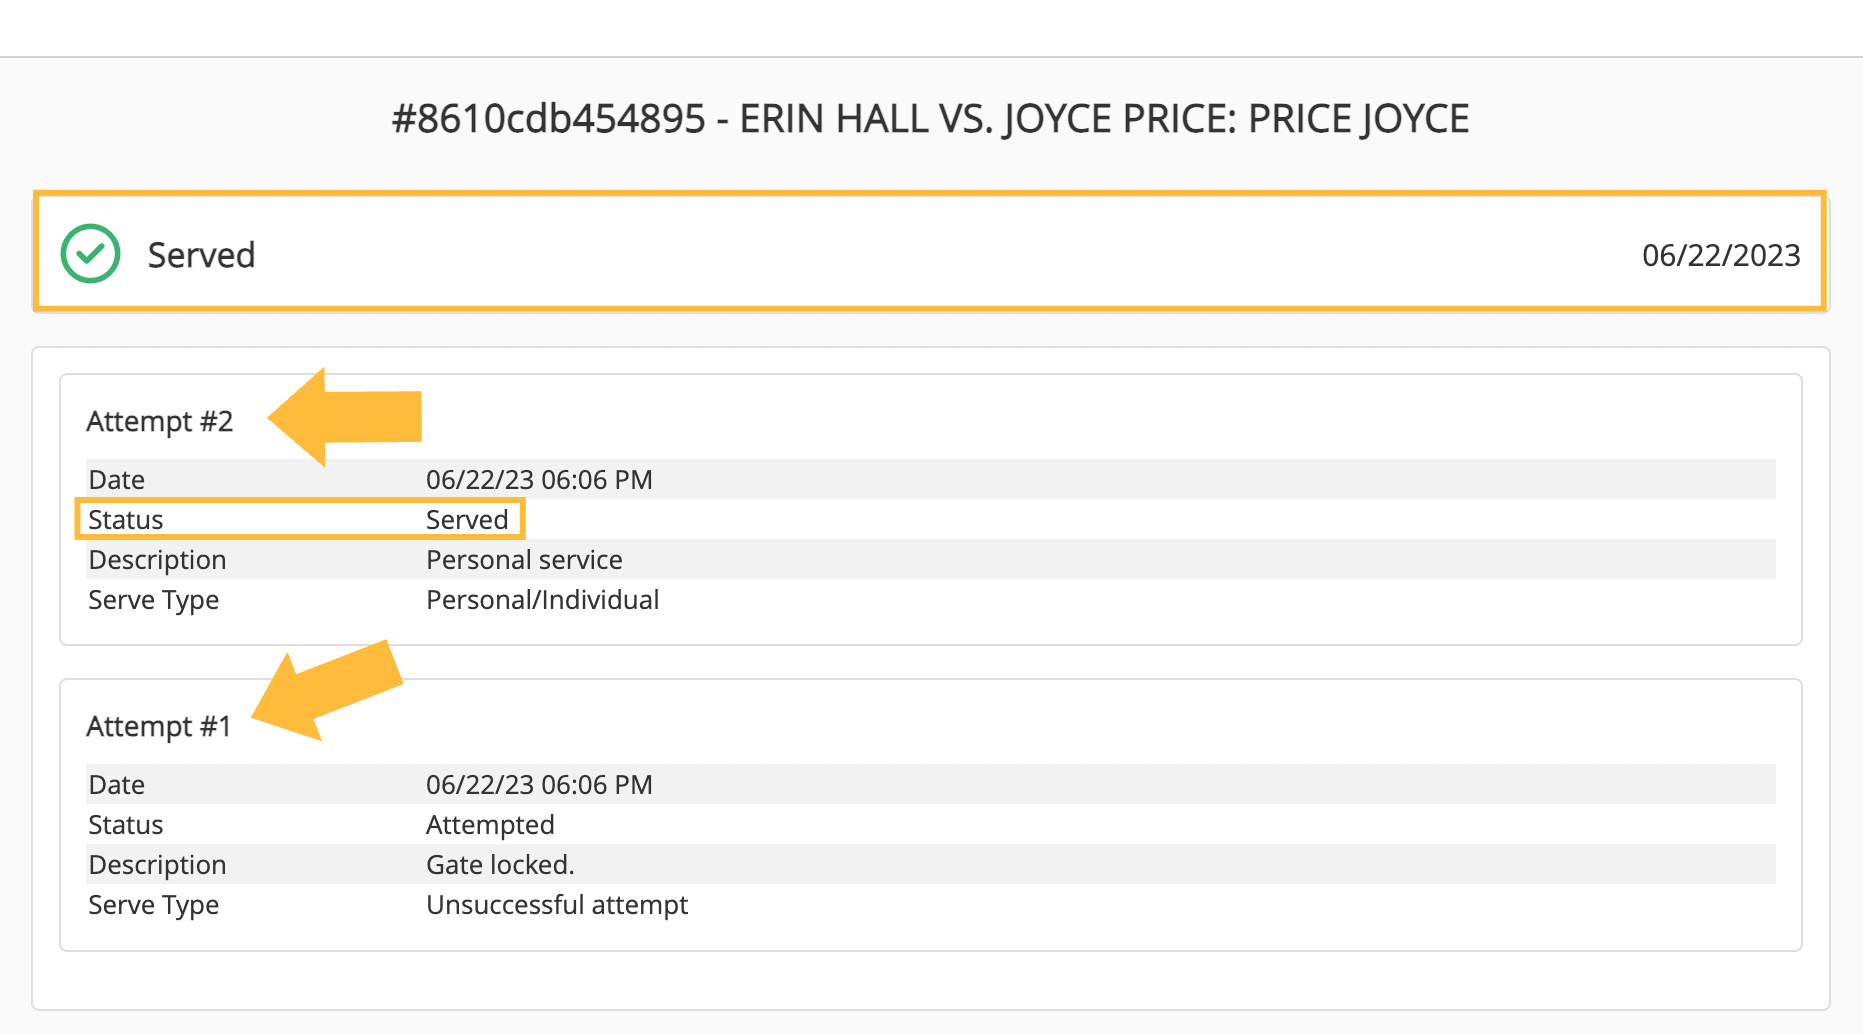
Confirming your order
After you've submitted your stand-alone process serving order, the details you filled out will appear on the order confirmation page, along with an order status at the very top. Just beneath the status you'll see breakdowns of all the service attempts, ordered from most recent to least recent.
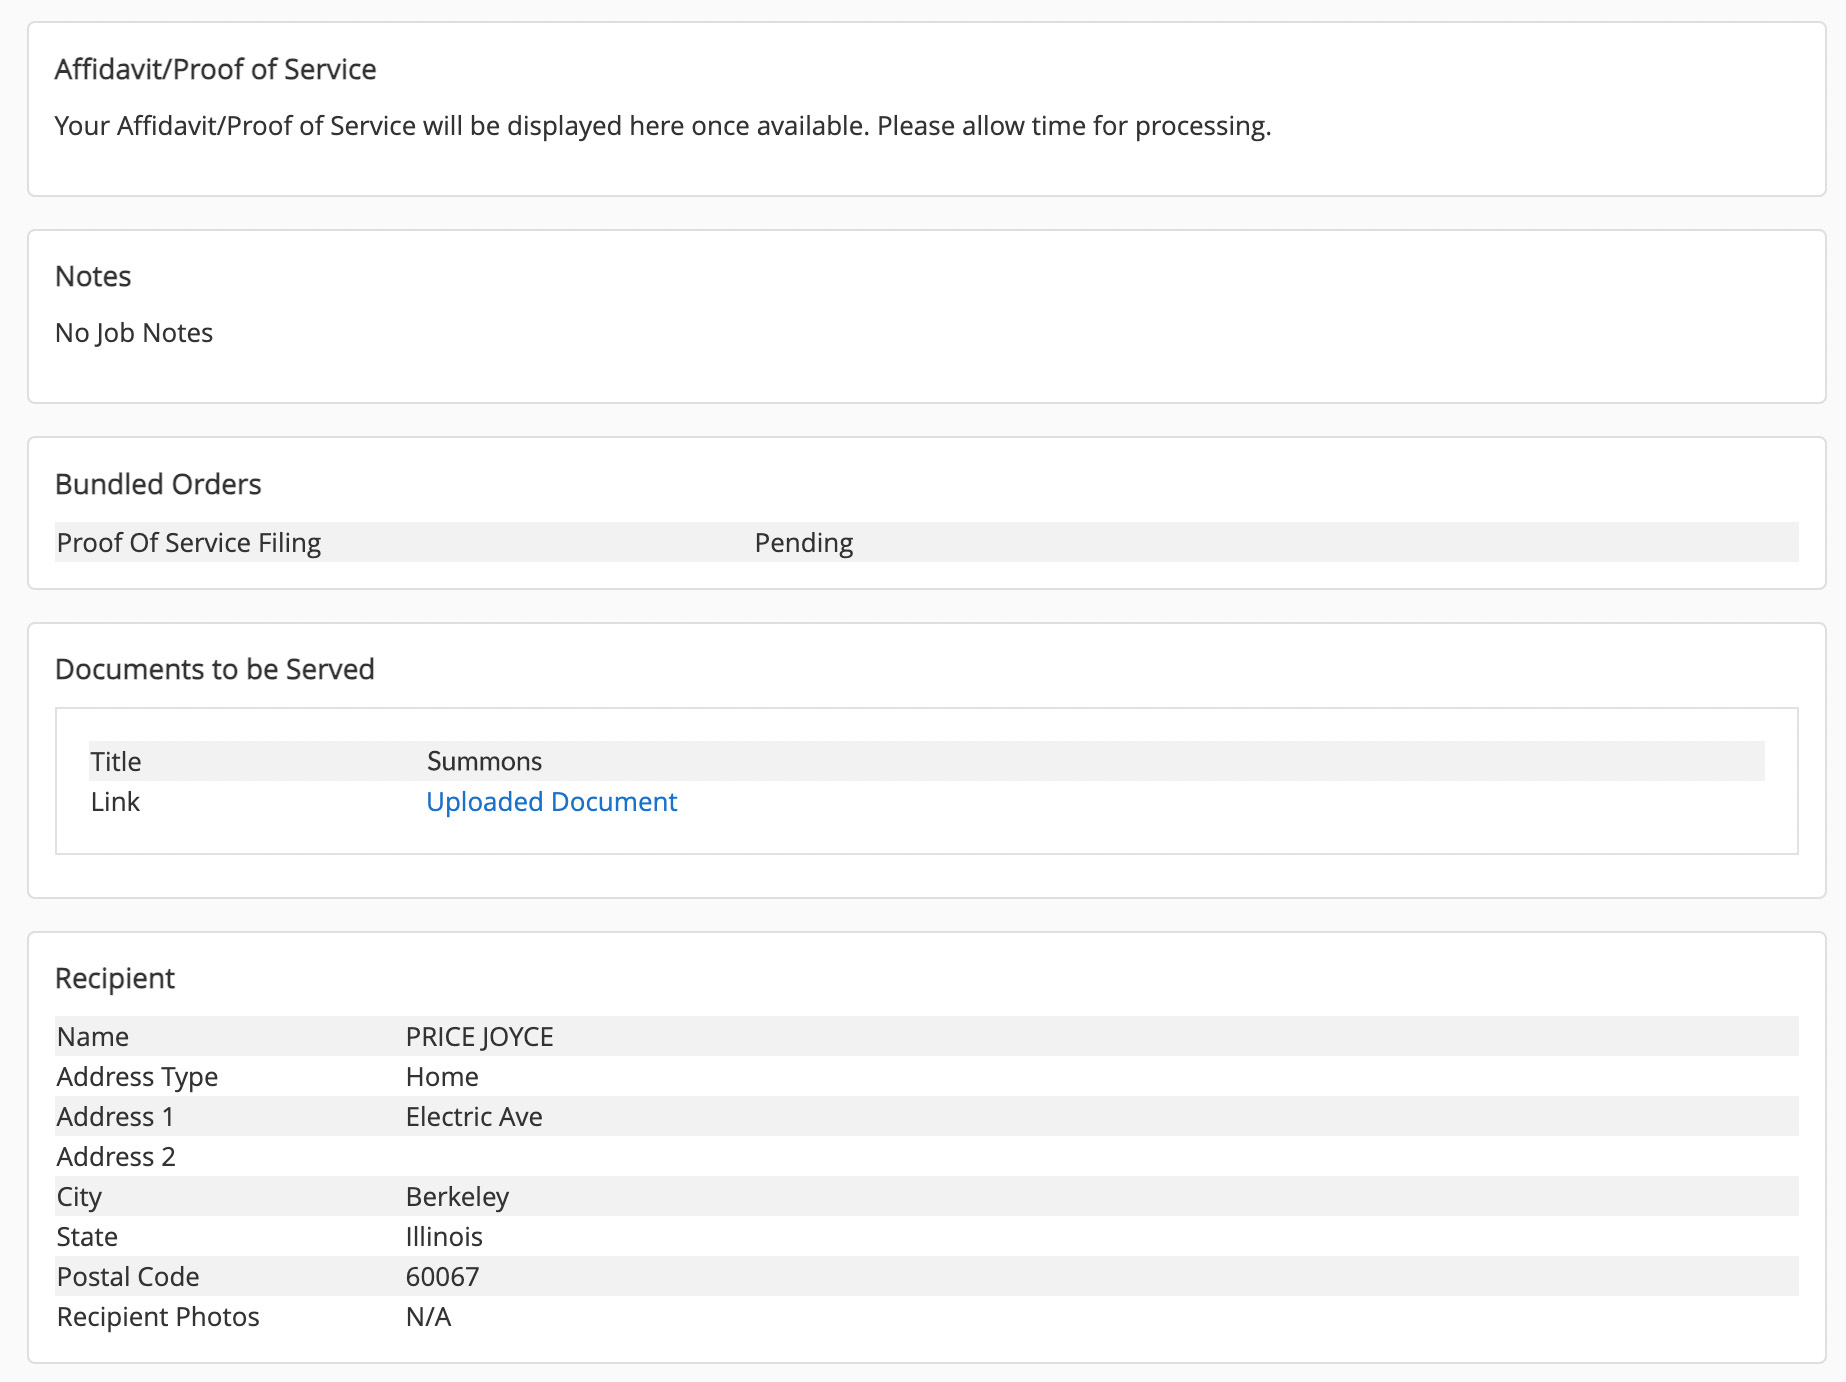
Below the attempts, you see information about any bundled orders, such as an automatic proof of service filing. You may also see notes from the server, copies of documents to be served, and your recipient information.
After you've left the Order Confirmation screen, this information can be accessed again by locating your order on the Order Search page.