When you often fill out the same standard forms in the course of your work and distribute them for signature, it can be helpful to use SignIT's template feature to speed up your work.
A SignIT template will save the positioning for all your standard document markup, which then can be applied instantly to any newly uploaded document.
Step 1
To start creating a template, you must first add markup to a sample document (or set of documents) that will have all the same markup and positioning you want to apply to future documents.
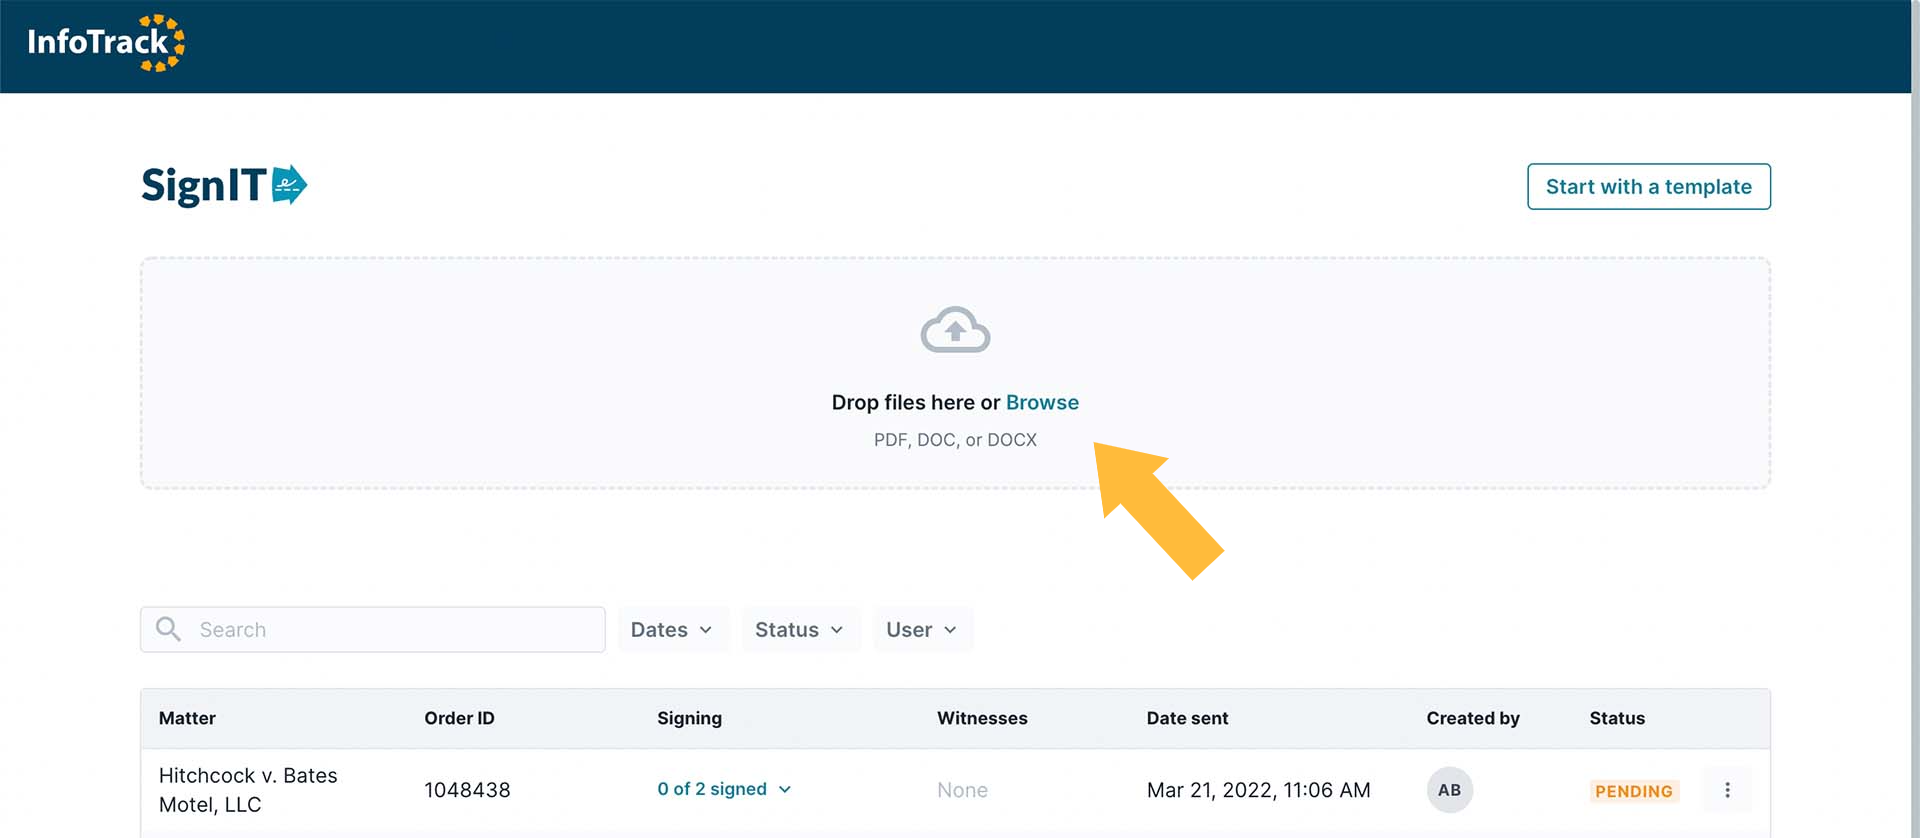
Navigate to the SignIT dashboard, and drag a sample document (PDF, DOC or DOCX) into the drop zone.
Step 2
Add your envelope details, including the matter name, and start editing the document.
Step 3
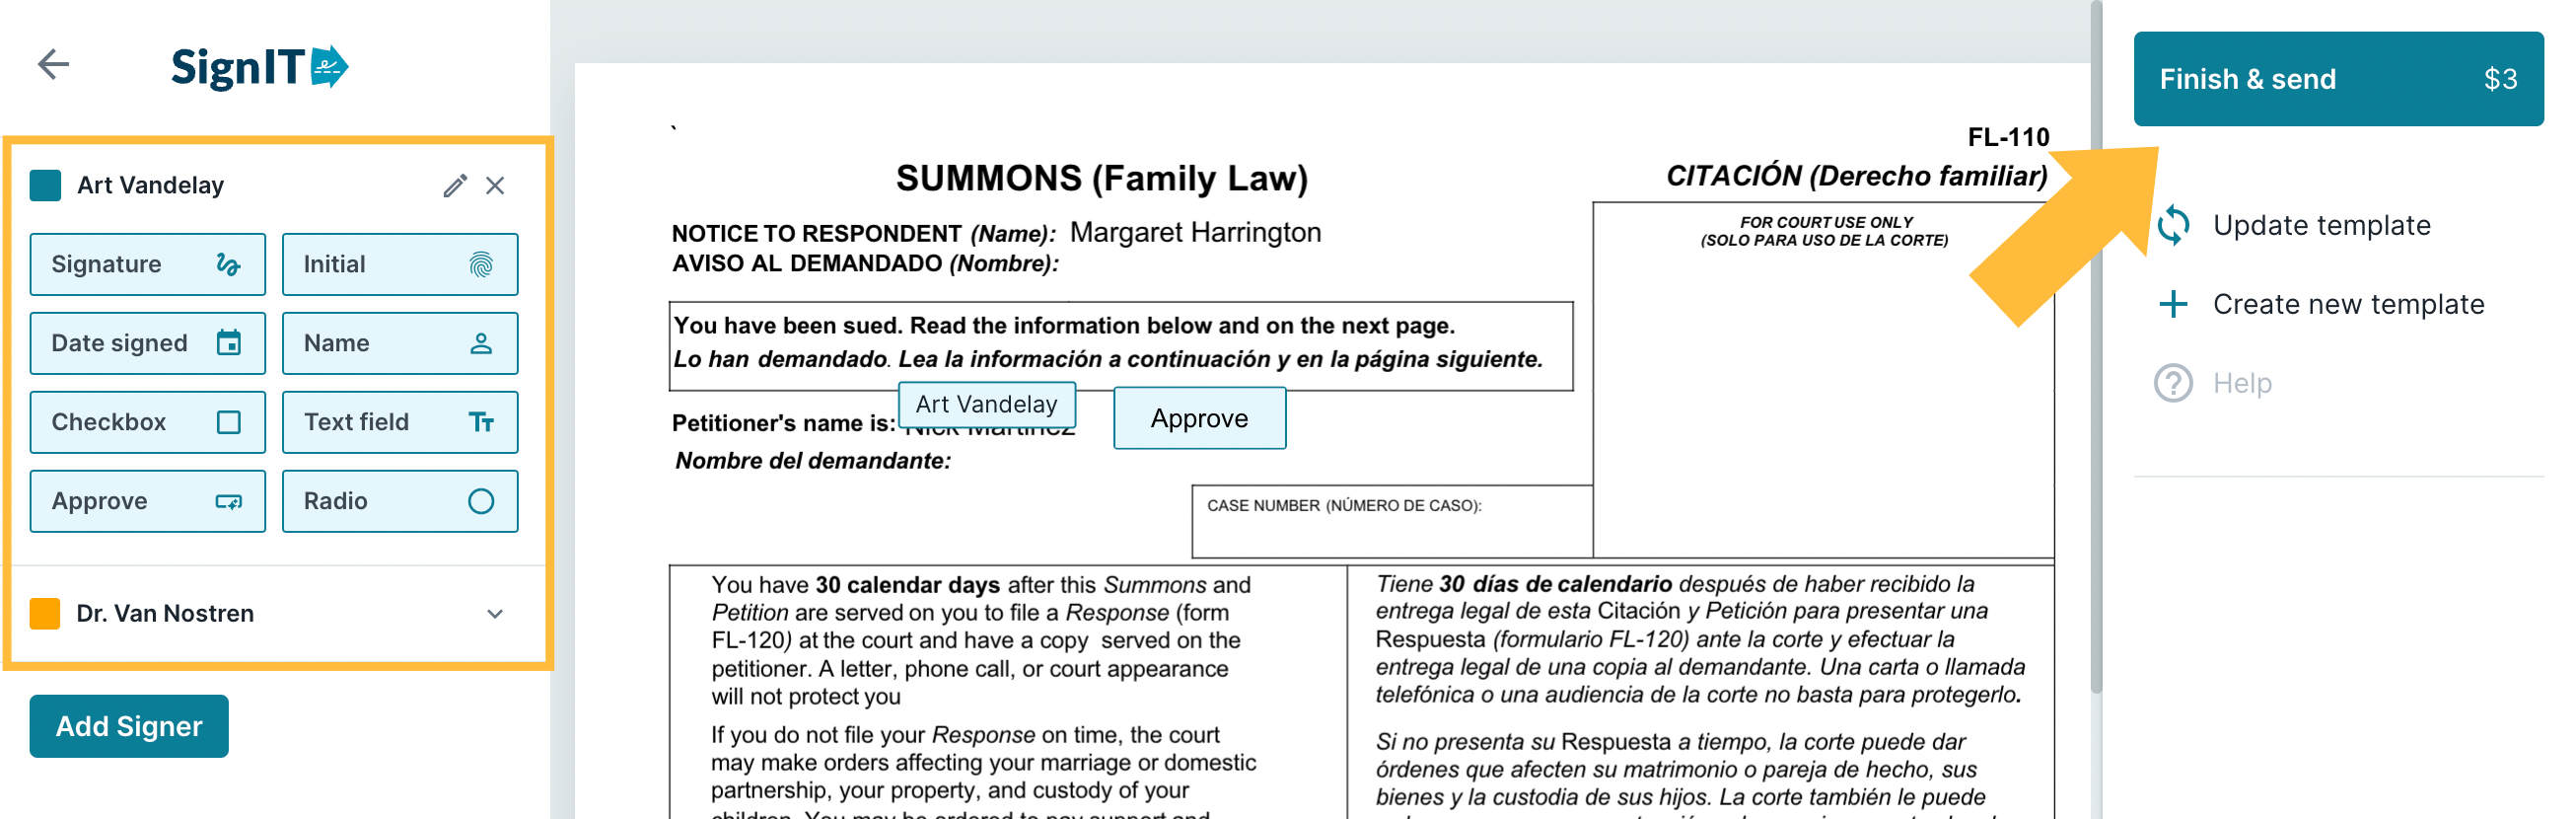
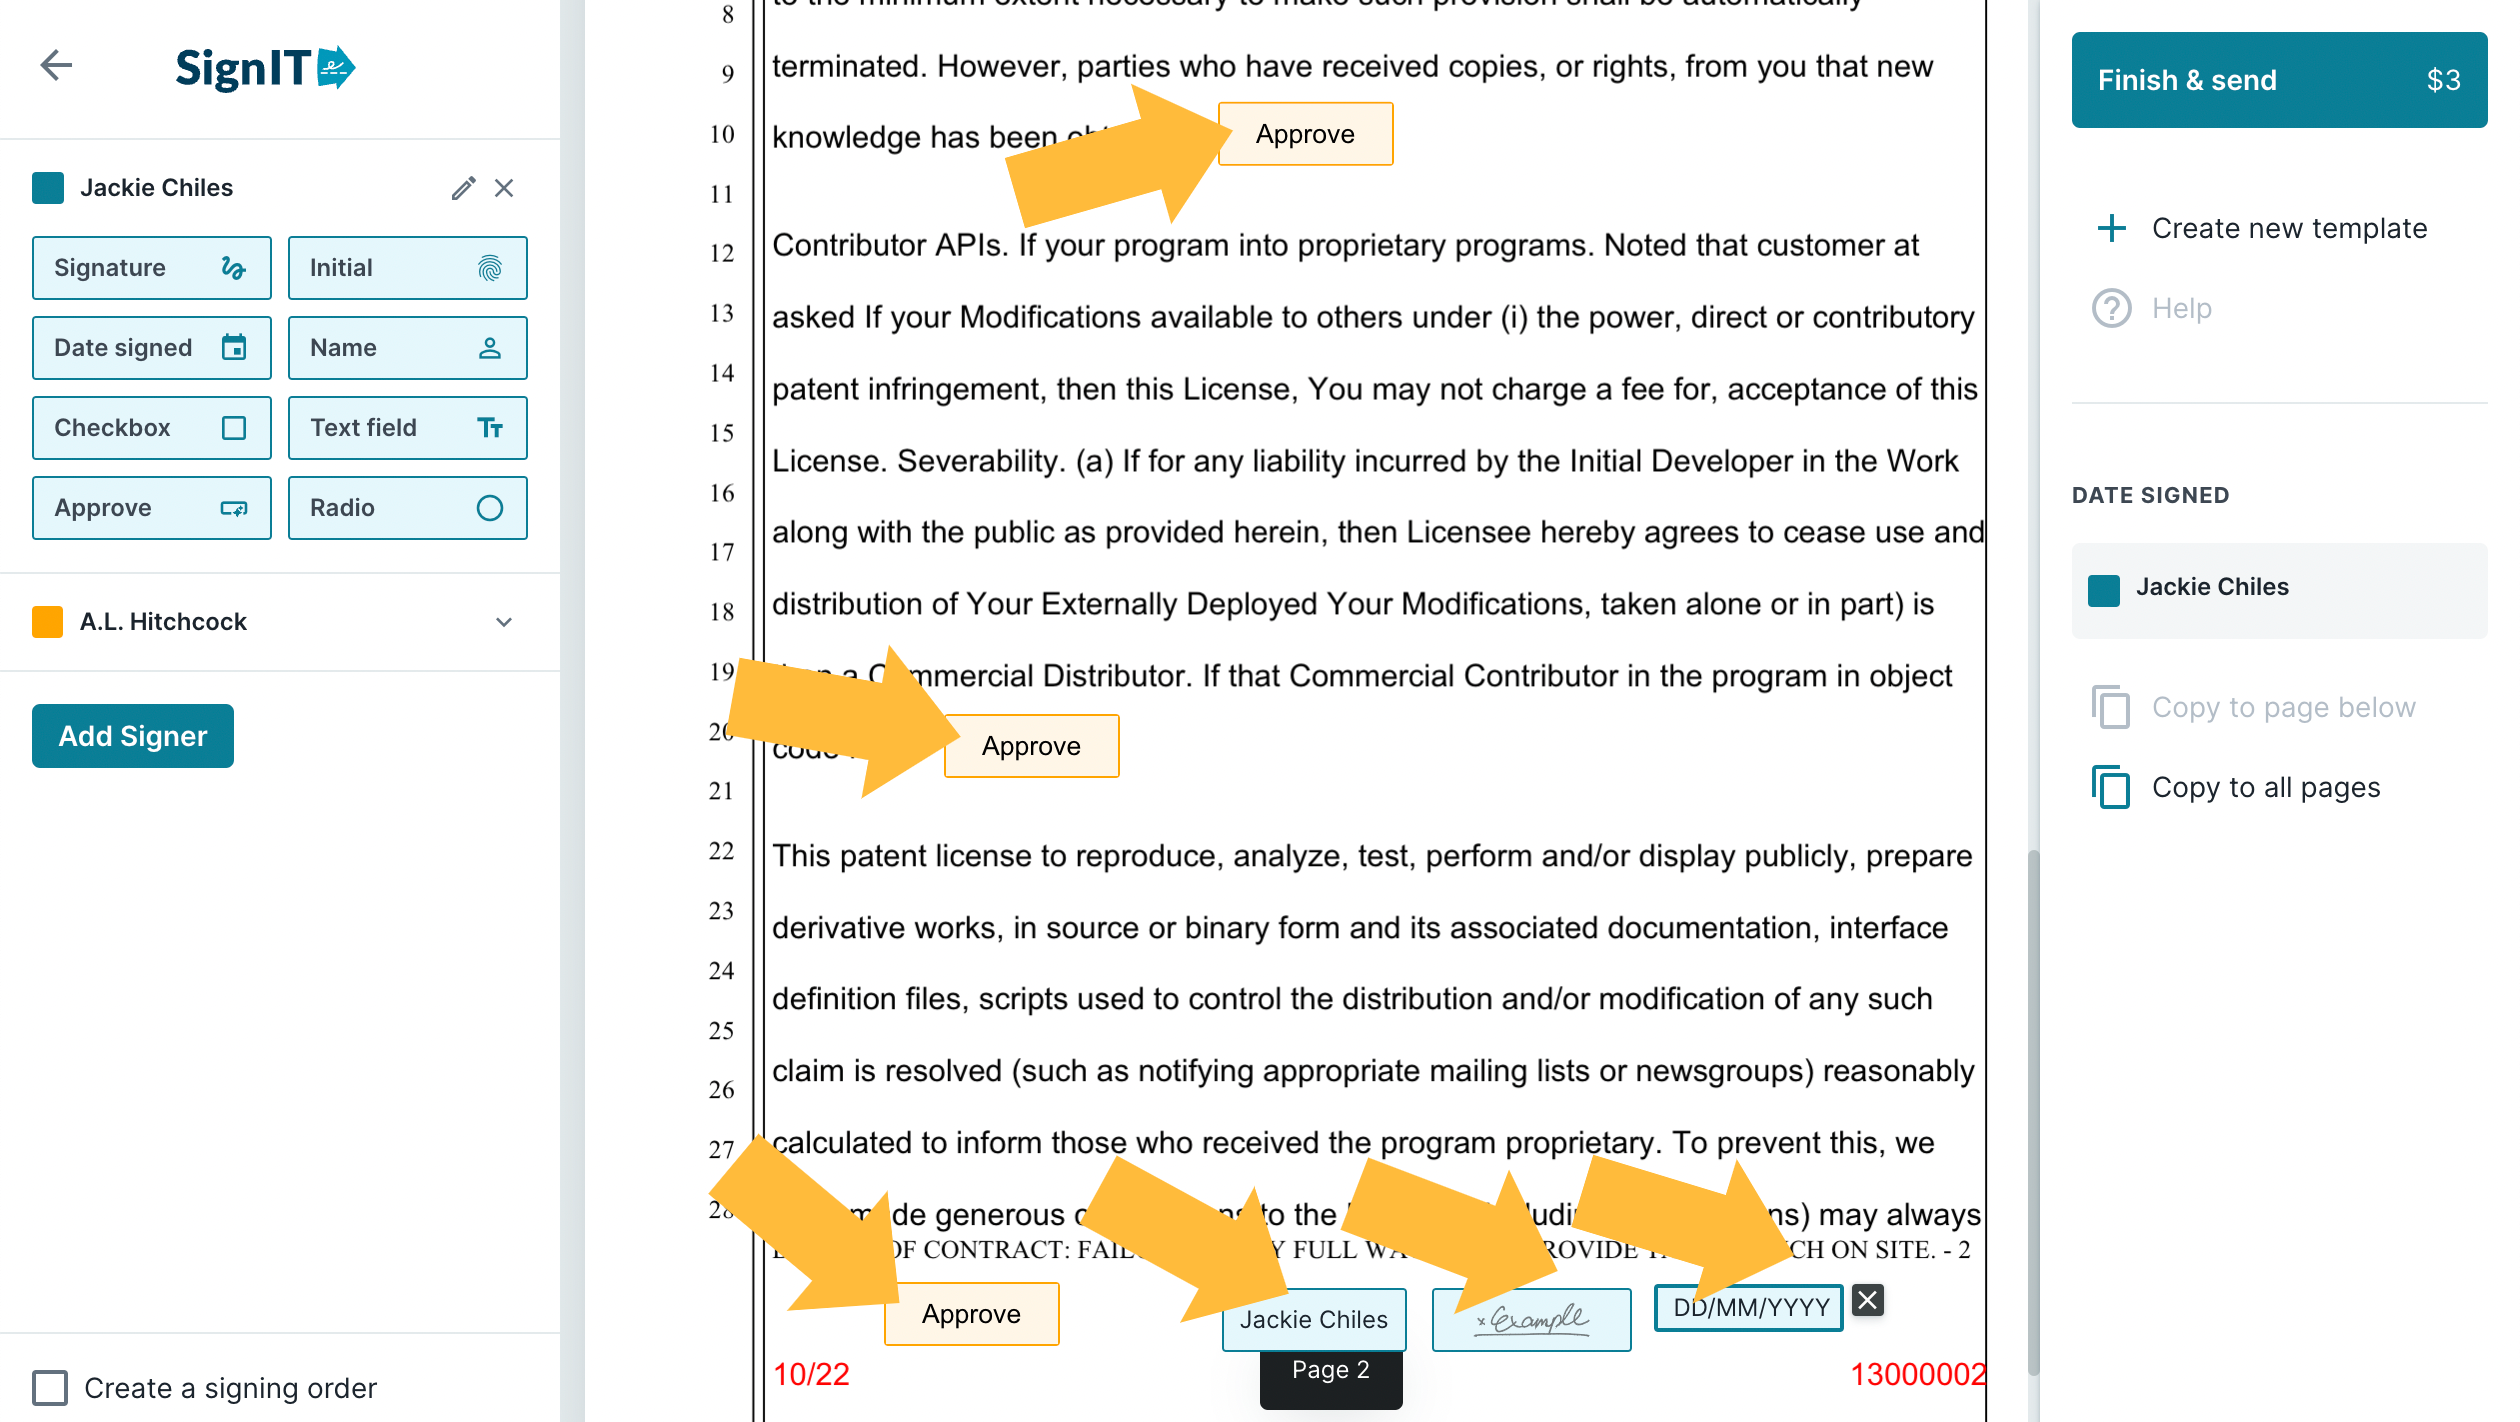
Drag all the markup elements to the places where you want them to appear on the template.
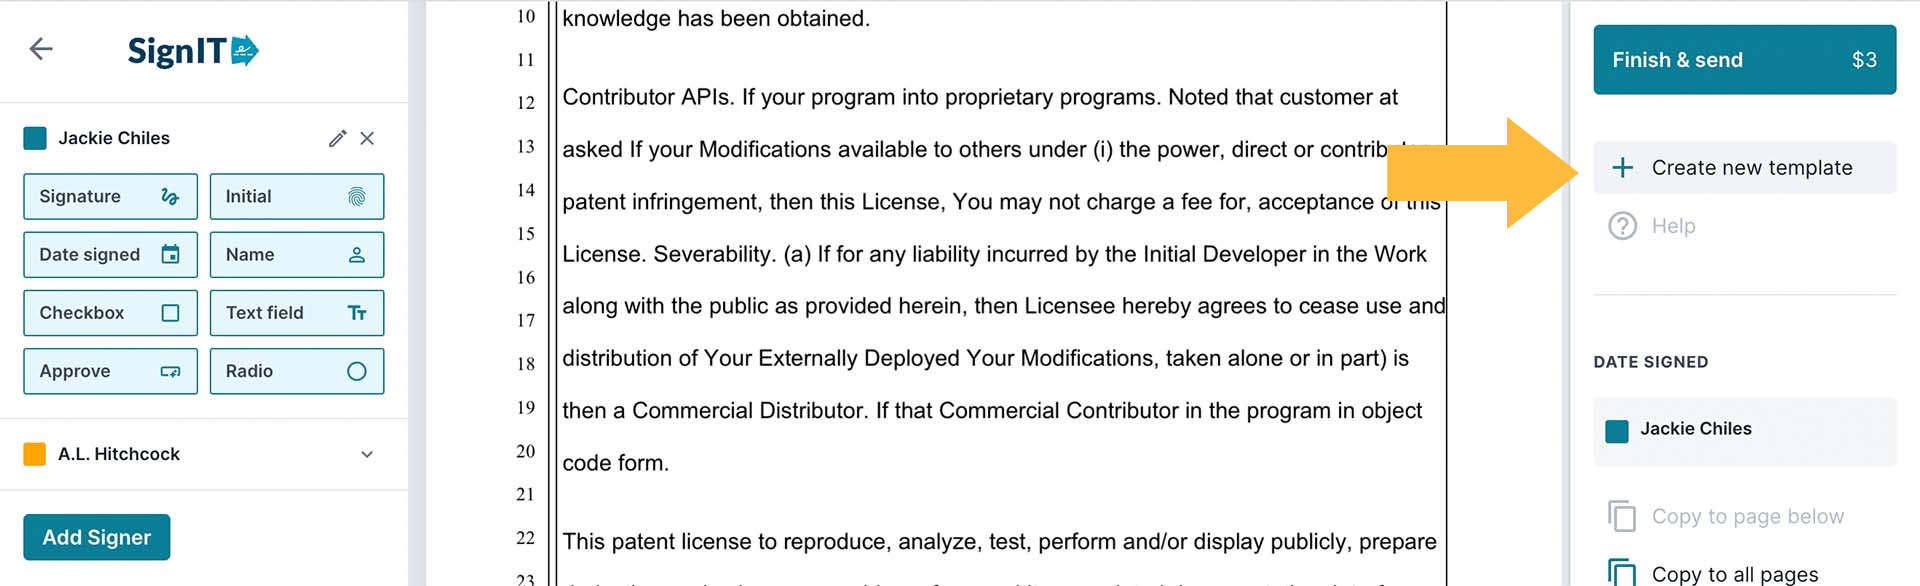
When you're finished, look just below the Finish & send button and click Create new template.
Step 4
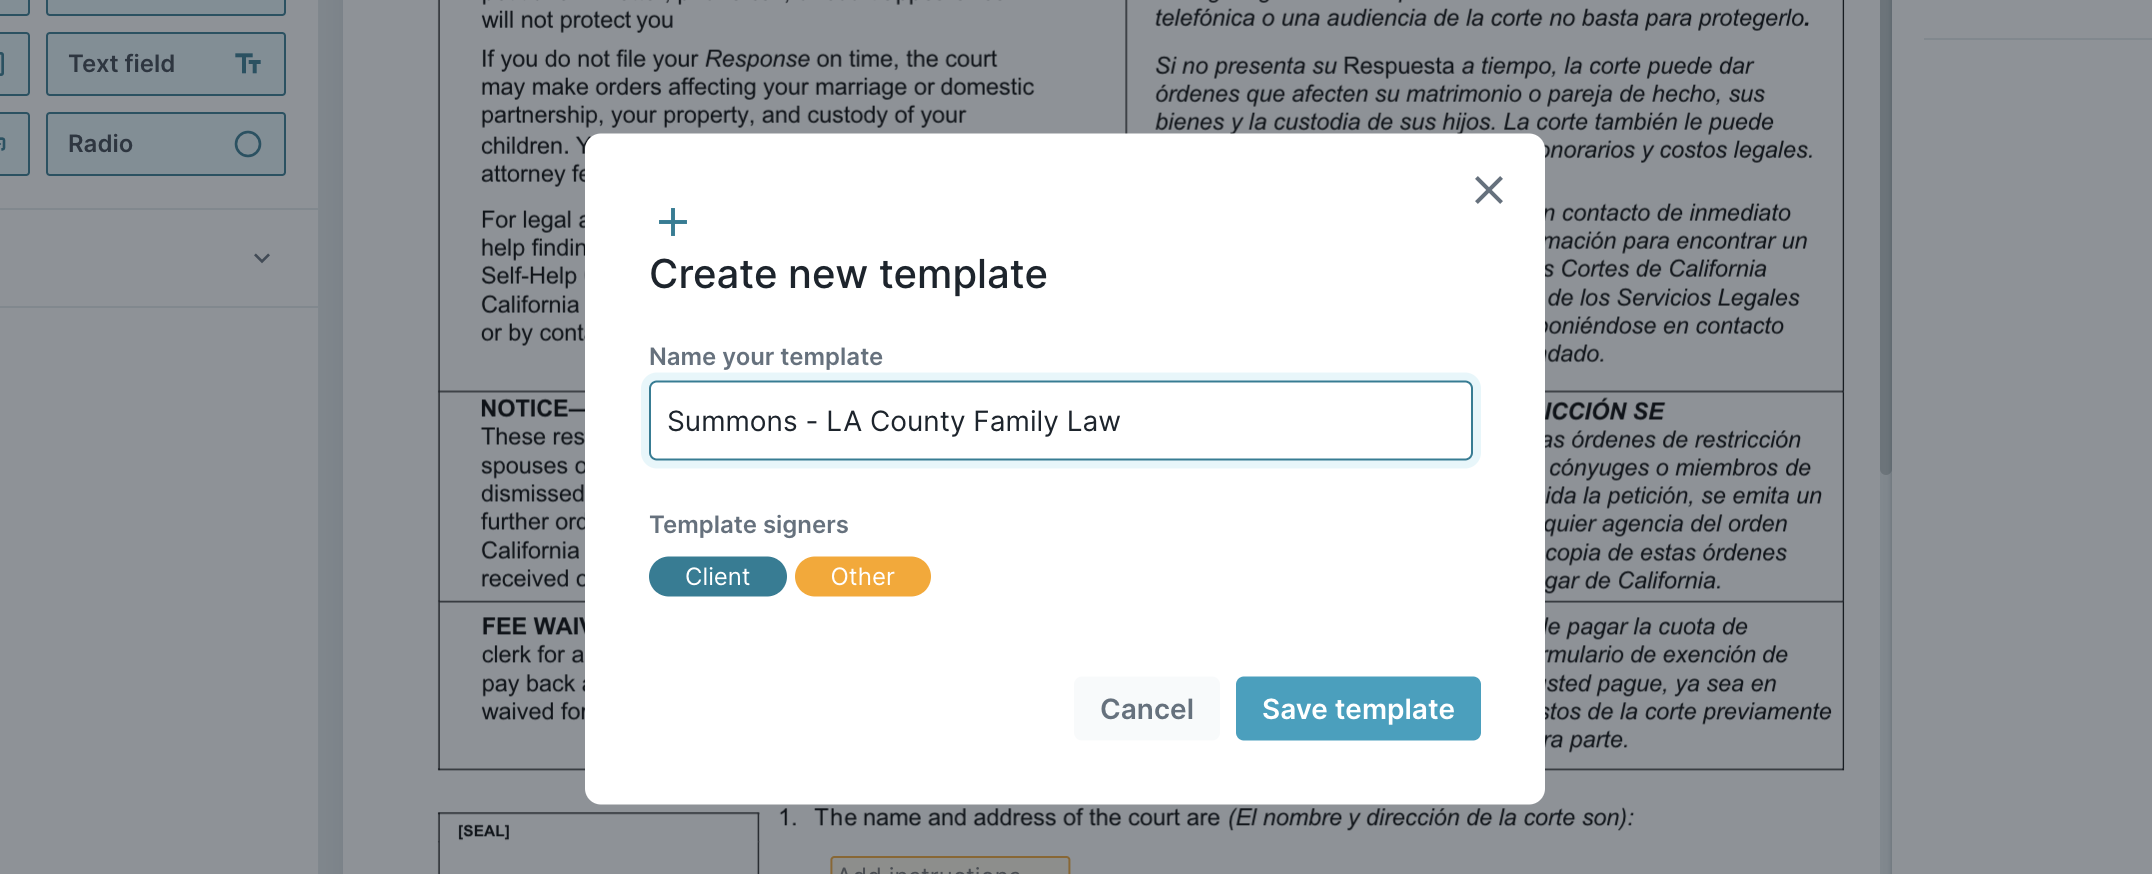
A modal will open asking you to name your template. Notice that all party types included in the document markup will be tagged under "Template signers."
Choose a name for your template that will apply to all documents you wish to mark up in this exact configuration. To finalize the template and continue, click Save template.
Step 5
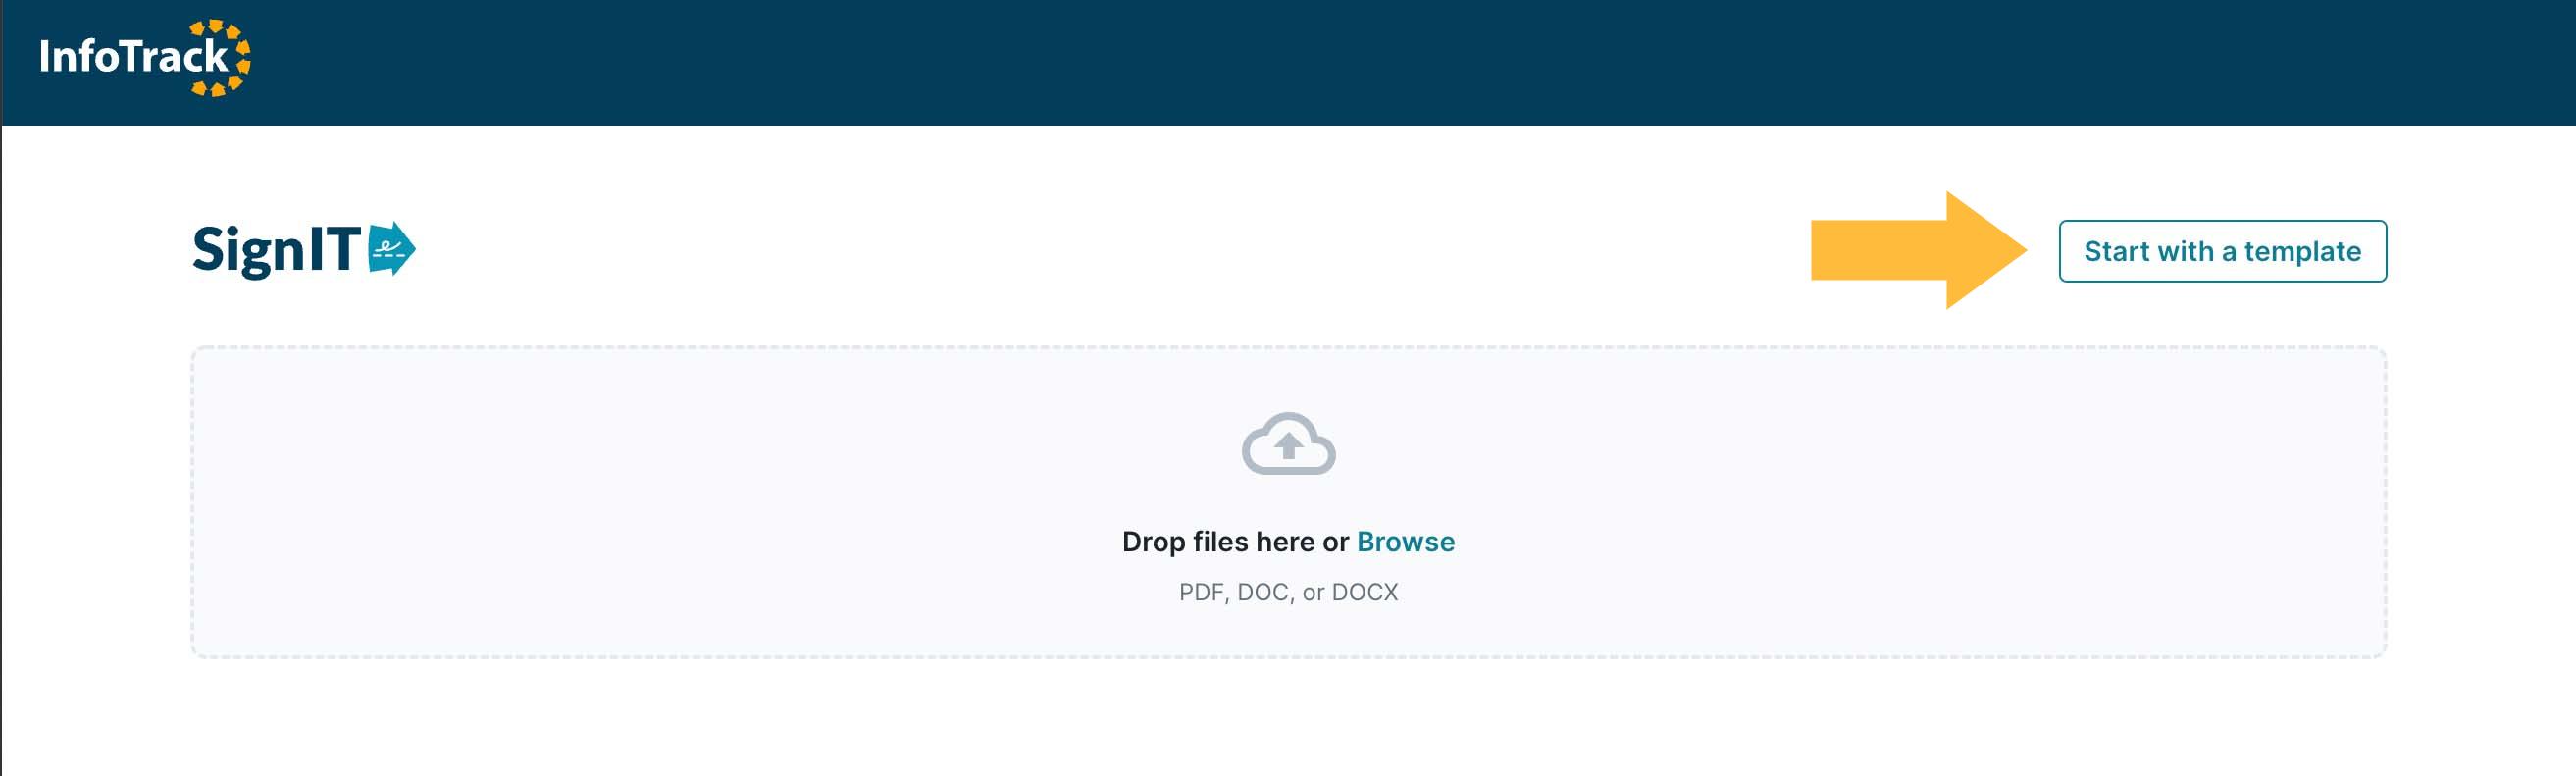
Return to the SignIT dashboard by clicking the InfoTrack icon in the header. Click Start with a template again.
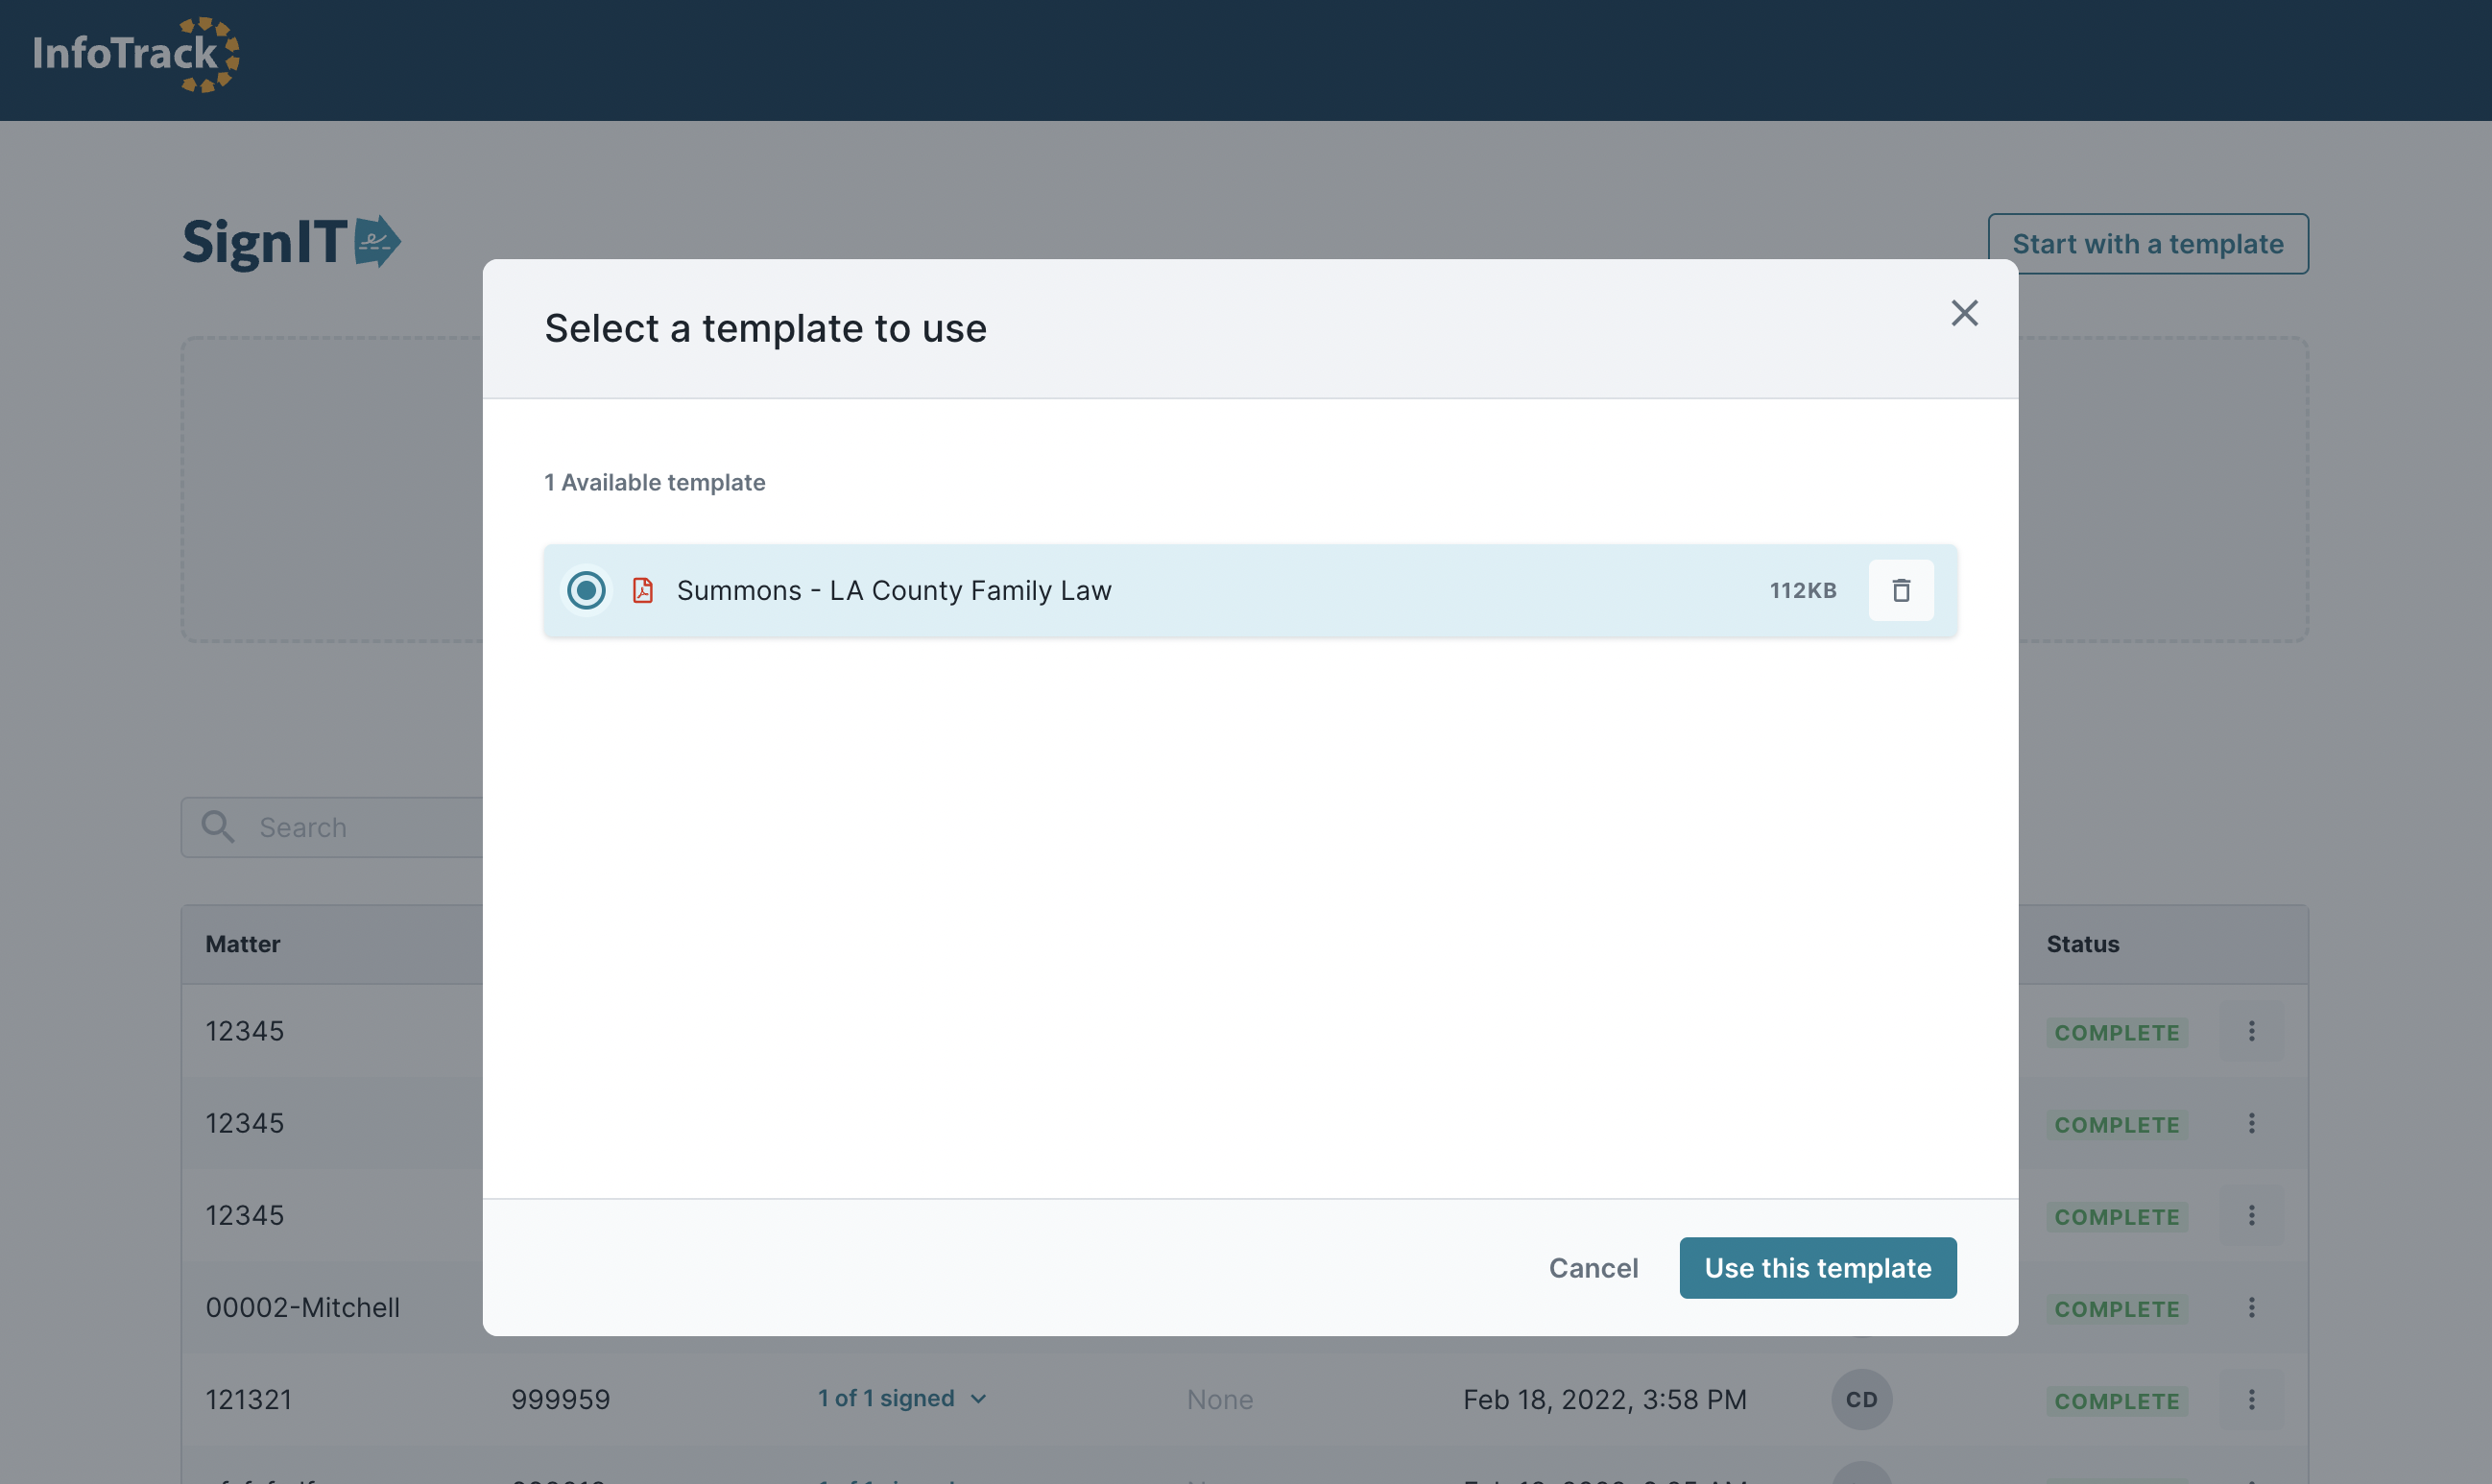
This time, you should see your saved template appear. Click the radio button to select your saved template, then click Use this template.
Step 6
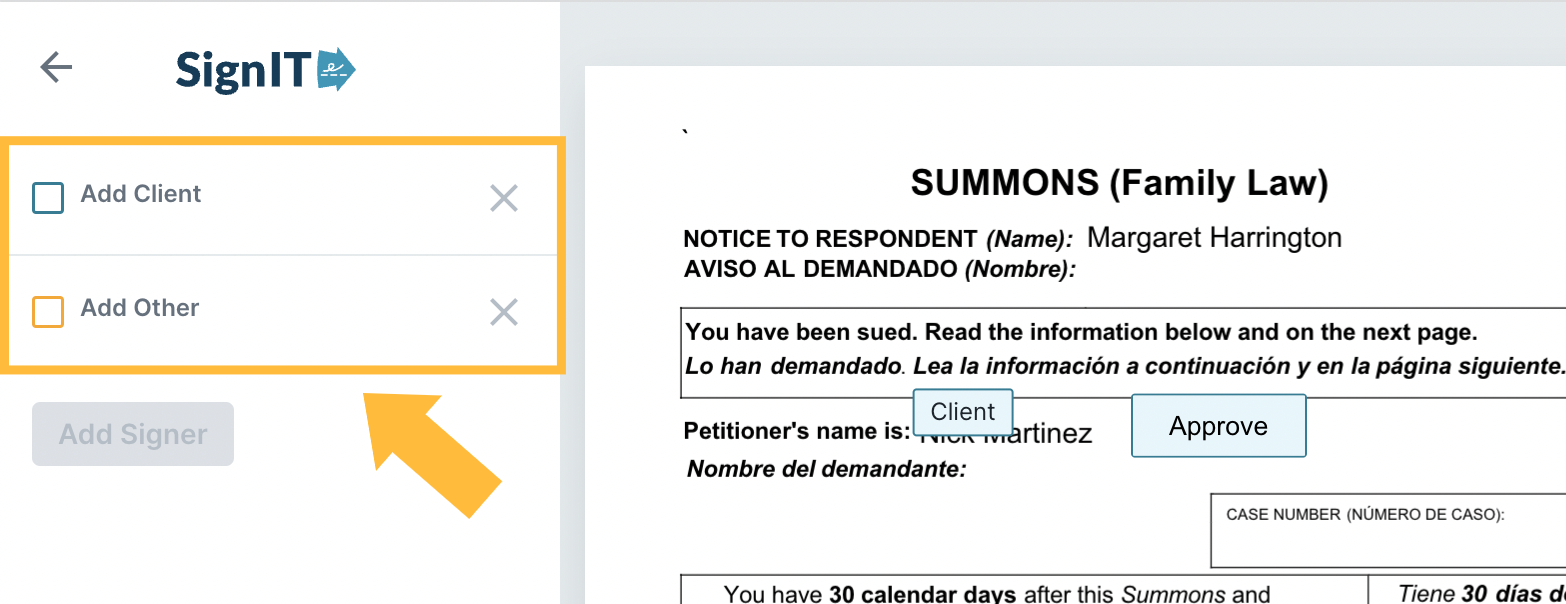
The Document Markup screen will appear, with color-coded signature elements in the same places you saved them when you created your template.
Notice that each color-coded signer has a hollow square next to the signer category on the left panel, and the Finish & send button on the right panel is ghosted. This means signer information must still be added in order to complete your eSignature request.
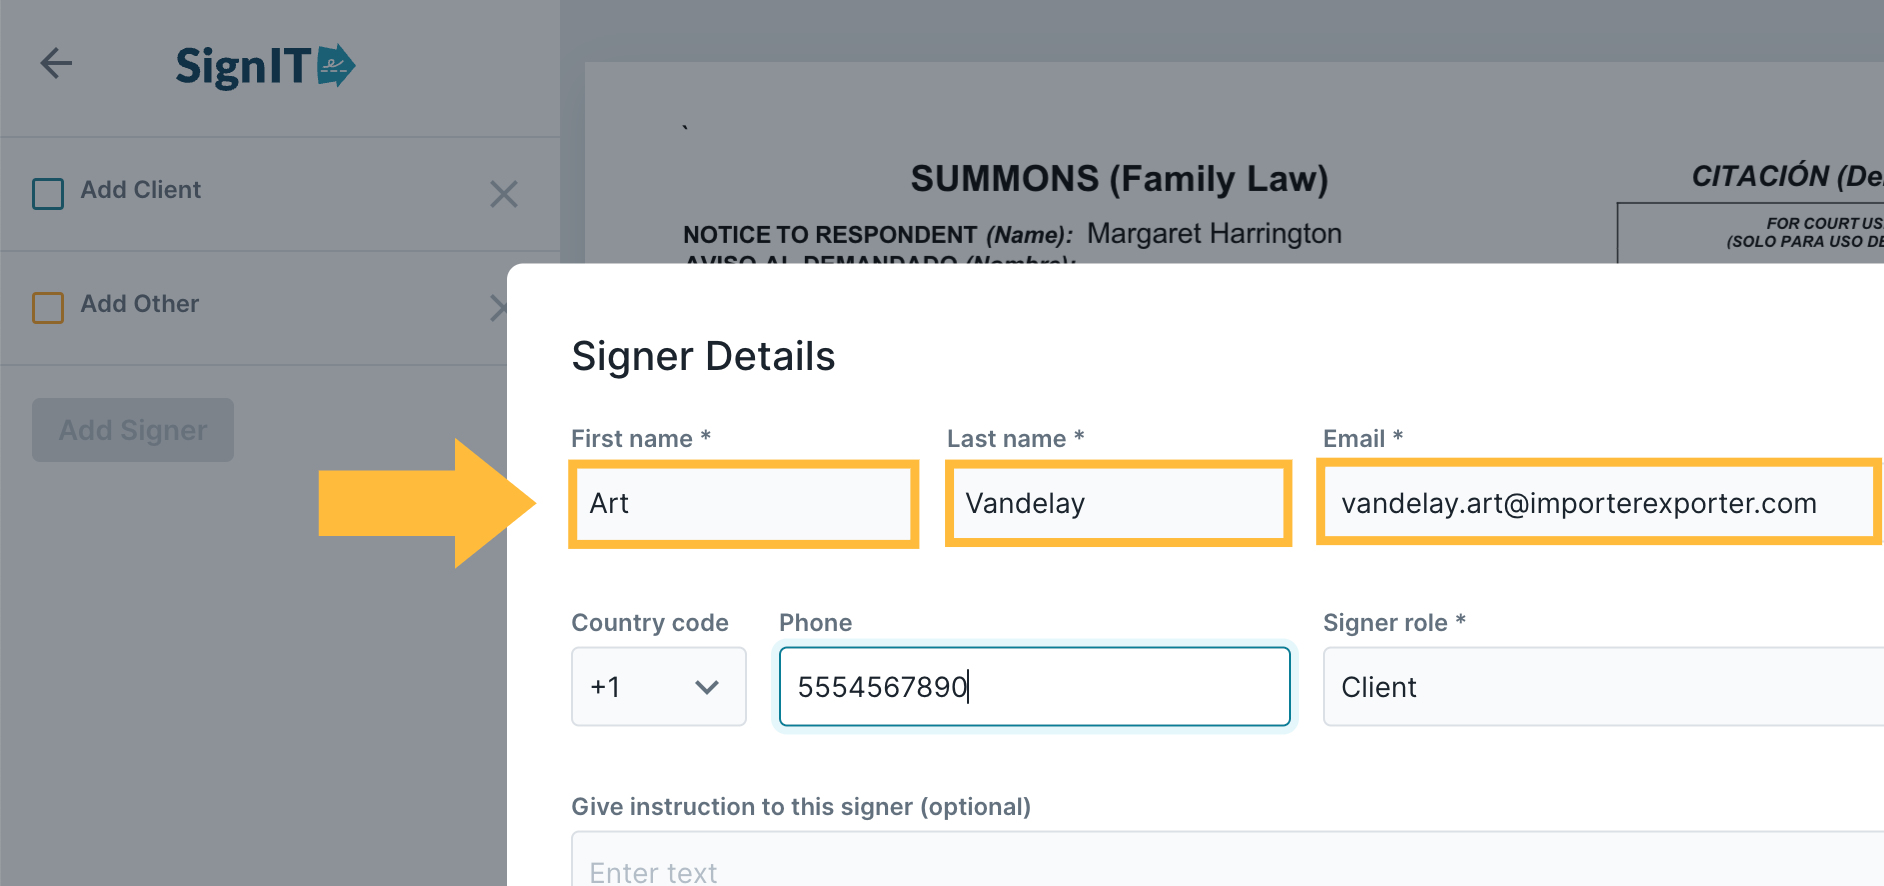
Click each signer category and add signer details, then click Save.
Once all signer details have been added, the hollow squares in the signer panel will be filled and the Finish & send button will be reactivated. You may click the button to place your eSignature order now, or continue adjusting document markup as necessary.